How to sample paint colors.
Posted on October 11, 2022


You’ve heard it repeatedly: Try out the paint color before you buy enough for the whole project.
But, once you have paint colors you like, what’s the best way to sample them? This article will explain how to sample paint colors so the color you think you’re getting is the color you actually get.
Need some paint colors to start? Start with these colors:
Here’s a list of our “universally appealing” paint colors suggested by our designer Kate.
Let’s go step by step through the paint sampling process:
1. Don’t judge paint colors inside the paint store.
If you are getting your list of colors together, never use the light in the paint store to judge color.
If you haven’t time to bring the fan deck of colors home, at least go outside.
Home Depot and Paint Stores Lighting tend to be unforgiving and different from home or office lighting.
2. Like a friend’s wall color? You likely have to “adjust” that color to your home’s lighting to make it look the same.
Since your home will have different lighting, Kate, our free in-home designer, considers your friend’s color and then chooses a color that looks the same in your lighting.
In other words, the color you end up with may not be the same color your neighbor has, but it will look the same in your lighting.
3. Order large paint chips or get small jars of sample paint:
Now that you’ve got a short list of paint colors don’t ever choose one from the tiny fan deck the paint store provides.
You need bigger paint color samples, and you have a couple of choices on how to get these:
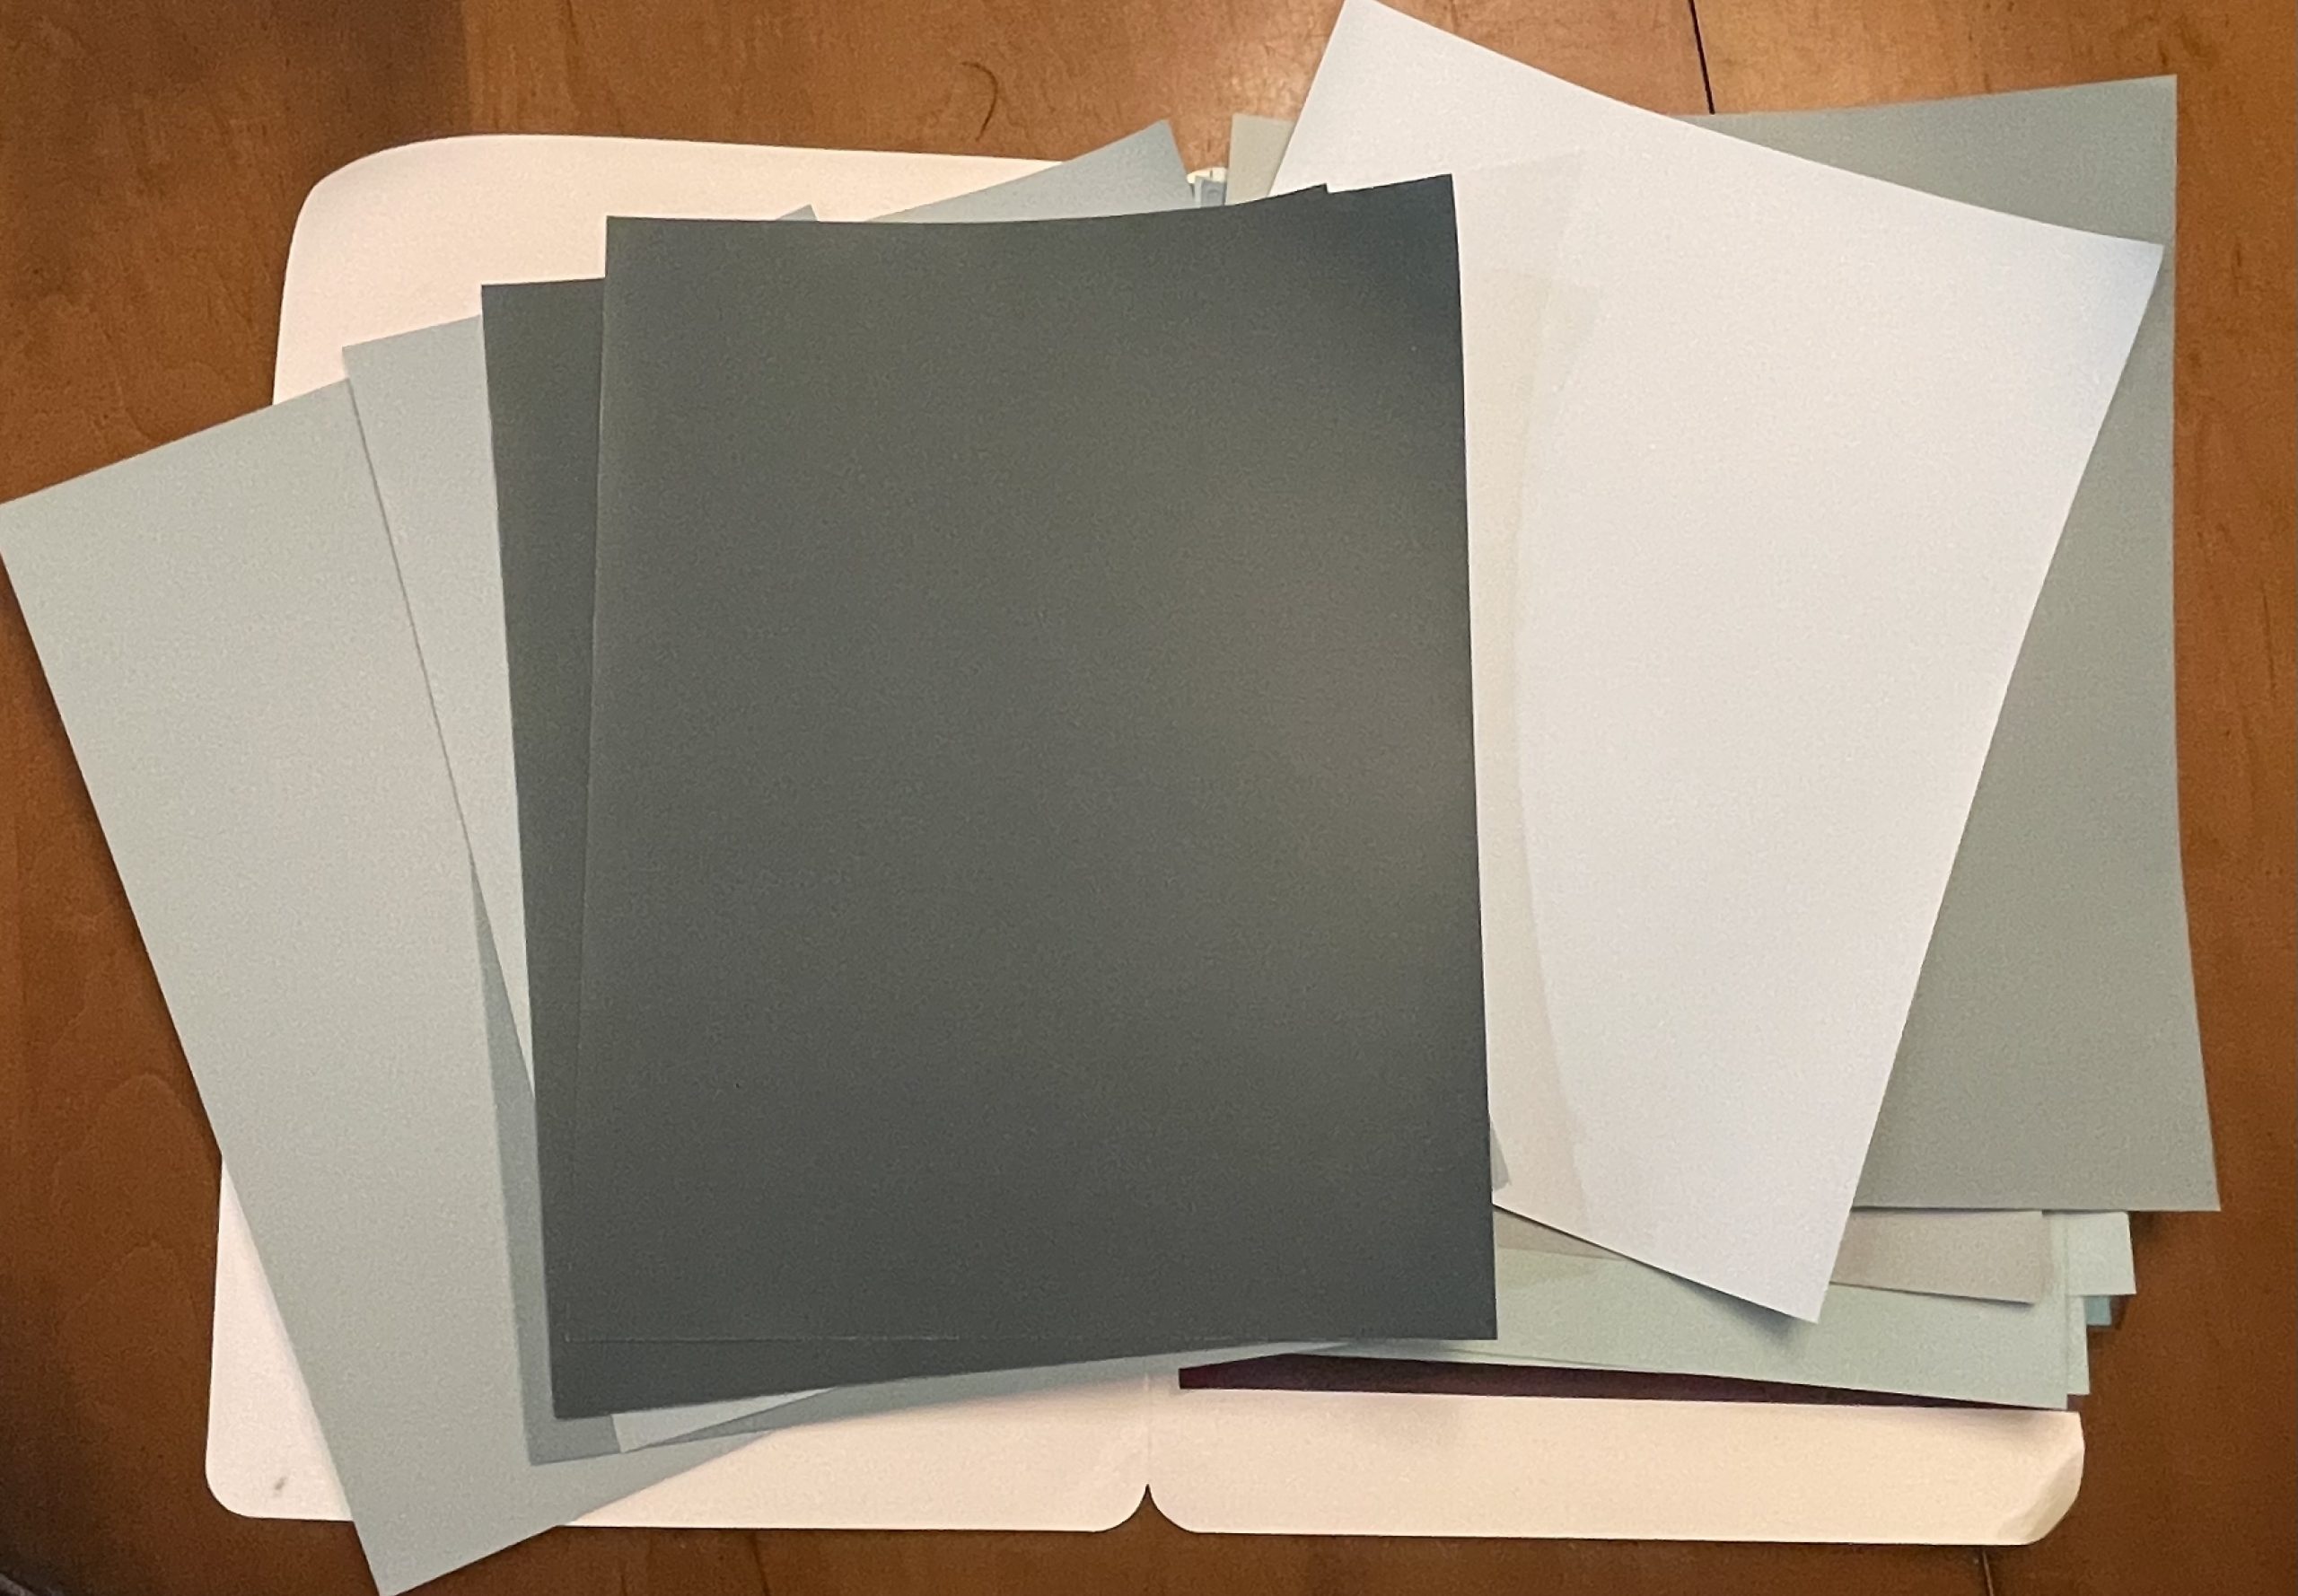
Our preferred sampling method – Large paper paint chips:
We’re happy to order 8″ x 10″ large color samples from Benjamin Moore or Sherwin Williams at no cost to you.
Email Paige at [email protected] with the names or numbers of the colors you’re considering, and she’ll them mailed to you. This is a free service, even if you’re doing the painting yourself. The samples take a few days and arrive by (snail) mail.
This is our preferred method of sampling because with paper samples you can:
- Move them from wall to wall to see how they look in various parts of the room where lighting may be different.

Tape a few large paint chips of the same color together to get a better look at the color in your space. Order a few samples in the same color and tape them together to form one “big sample” that’s easier to view.
- Eliminate paint colors without having to live with swaths of paint on your walls while waiting for the painters to arrive.
Small jars of sample paint:
These are available from nearly all manufacturers on their websites or by going into the stores.
If you don’t have time to order the large paper samples, painting swaths of paint on your wall will be just fine.
Remember to paint the samples using two coats of paint to get the true color of how the paint will look in your home.
Hint: Save the jar of the winning color to use as touch-up paint. If you stick a q-tip or small foam brush to the top, you’ll be able to make touch-ups easily.
Give the paint at least 2 hours to dry:
Paint companies recommend that you wait two hours before judging the color. Before that the color will not be what you end up with.
Often customers will be upset when they see a color freshly applied because it will usually look too bold at first, but the color will often mellow as the paint dries.
But if you are not happy with the color of the paint and it’s been 2 hours – stop the painters from painting. You don’t want to incur more in labor costs. While it might be uncomfortable bringing the job to a screeching halt to choose a different color, the sooner you do it, the less it will cost you.
How to dispose of sample paints:
Unwanted paint color samples can be disposed by leaving the sample can open. Over time the paint sample will harden, and you can toss it in the recycle bin.
You can also reuse the sample paints for kids’ art and other paint-related projects.
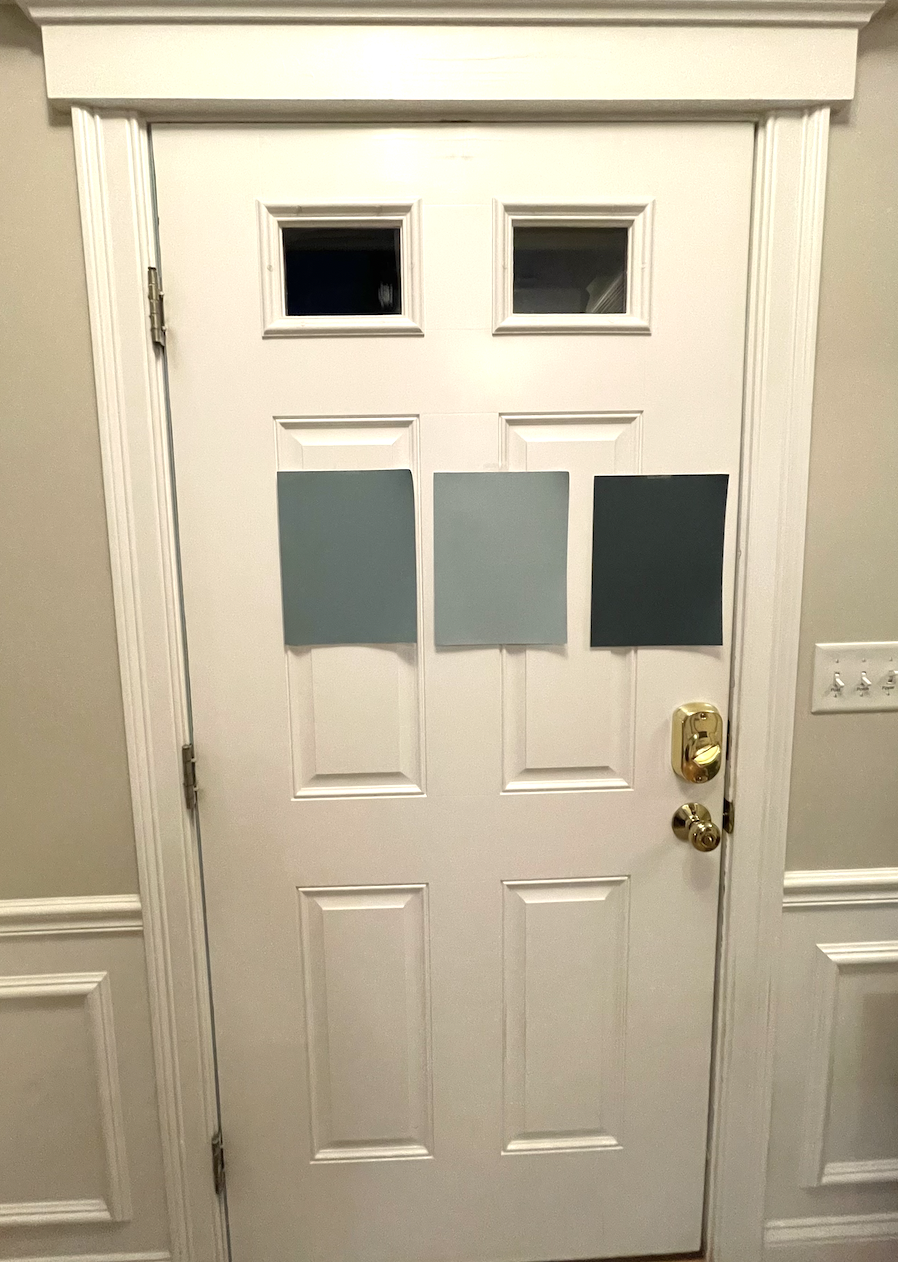
4. Rule of thumb: Your trim color will affect how your paint color looks.
If you tape your large samples to the middle of the wall, the color will naturally look different than if you stick them to the doors or trim in the room.
Stated differently, by sticking the paint samples up in the middle of the wall, your current paint color will affect how it looks.
For example, if the current wall is blue and the paint you’re sampling is gray, the gray paint sample will take on the blue hue of the wall.
Hint: Place the sample on a door that’s the same color as the room’s trim to get a read on the sample’s “real” color.
5. View the sample paint colors at different times of the day.
For interior paints: Leave the paint samples up for a few days and check them at different times. Color values look different on a sunny day than on a cloudy one and different at night than late afternoon.
For exterior paints: Getting the exterior paint color right is crucial because it’s such a big job that’s supposed to last about 7 years.
Choose the least conspicuous side of your home to sample exterior paints, and apply your paint color samples in two coats. If you are going from a very light to very dark color or vice versa, you may need 3-4 coats of paint to get a decent sample.
Take about a week to assess the colors – look at each color at different times of the days. And look at the color when walking by and from driving up the driveway. The more ways you assess the color, the more likely you’ll love it.
If you’re painting the same color in different rooms, you must sample the paint in each room. Each space may look different depending on the lighting of the rooms you paint.
6. Install lighting before you sample paint.
As with the time of day, overhead lights and lamps significantly affect the paint color’s final look.
Decorating in the right order is essential:
Choose fabrics, furnishings, and flooring first, then lighting and paint last.
This is because you can match paint with any fabric, but if you start with a wall color, it may be impossible to find a fabric and flooring that coordinates with the paint.
Paint Sheen affects the perception of the color of the paint:
The sheen of the paint will change your perception of the paint color:
- Shinier sheens (gloss and semi gloss) will feel deeper and darker color. These sheens also show every imperfection.
- Matte or flat sheens show the truest paint color and will hide imperfections well.
- Eggshell is a “medium sheen” (think of the shine on an actual eggshell). Eggshell splits the difference between matte/flat and semi-gloss, but be careful about using eggshell on walls with many windows because it may seem even shinier than expected.
Paper color samples that are hung up usually have a flat finish. If you choose a shinier sheen, understand the color will appear deeper than the paper samples suggest.
7. A few paint colors will be easy to eliminate.
In our experience, once the large color samples are up in the room, some look so wrong that they can be eliminated in the first 30 seconds.
Doing this should give you confidence in your ability to know your own taste!
8. The final choices may be harder to eliminate.
Often the final choice is between two or three similar paint colors.
If you get stuck at this point, let the trim, cabinets, and flooring help inform your decision. For example, if there’s a lot of warmth in the furnishings, lighting, and flooring, you might lean toward a warm gray versus a cooler tone.
This is where our designer Kate can make the process easier – giving you confidence that your chosen color will look great.
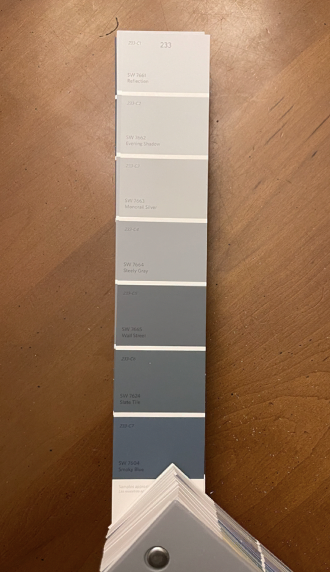
9. For monochromatic fan deck strips, look to the bottom of the color strip to see the undertones of a color.
First, a definition: Monochromatic color palettes are established on one single color tint.
When looking like a monochromatic strip in a paint fan deck, the colors on the strip are made by altering the saturation or brightness of the darkest color. See the example to the right.
Understanding this gives you a lot of information about the colors on a monochromatic paint strip because when choosing lighter colors, you may find it difficult to see the undertones on the color chip. This can get you in trouble if you think you’re painting a greenish-gray that ends up looking like light blue on all four walls.
To easily see the undertones, look at the darkest color at the bottom of the strip, and the undertones of the top color will be clear. See the example to the right.
Since the lightest color is a derivative of the darkest color on monochromatic color strips, use the darkest color to determine the undertones. This is especially useful when looking at grays.
Another hint: Since lighter colors on a monochromatic paint strip are simply the darkest color with white added, choosing two colors from the same paint strip is easy to ensure the colors will look nice together.
10. Don’t know the “bright white” paint color you want for your interior trim? Use Sherwin Williams’ Extra White.
This is our go-to trim paint color because it’s the base of all other whites.
When Sherwin Williams mixes paint for any of their ivories and whites, they start with Extra White as their base and add tinting to make the color.
This is important to understand because if you need to touch up your trim that inevitably gets dinged, picking up a quart of Extra White at Sherwin Williams doesn’t require the store to mix the paint. Because mixing paint results in colors that can subtly change from store to store, you can never be 100% sure that the touch-up paint will match the existing paint exactly.
Since Extra White is a base color requiring no mixing, you know you’re getting the exact color no matter when or where you pick up touch-up paint.
<<< Back to index of residential articles and resources