
How to Prep a Room for Painting
Posted on December 8, 2022
How to Prep a Room for Painting
When it comes to DIY painting, there is little that is more important than proper painting preparation. Taking the right steps before putting a brush on the wall will give you a better-looking and longer-lasting result in any room. Our professional painters are here to help you prep a room for painting with our painting prep guide. With this step-by-step guide in hand, you’ll be ready to successfully complete any interior painting project you take on. Let’s get started!
Clear Out the Room
The first step to prep a room for painting is to clear out the space you’ll be working in. The last thing you want is to accidentally drip paint onto your couch or swipe your kitchen table with the paint roller. A clean work area will also prevent you from having to reach into spaces at awkward angles and overall result in a cleaner paint finish. Roll up rugs, put valuables inside drawers, and haul it out of your painting area. And remember: lift from the legs!
- Consider taking off all light switches and plug outlet covers for a cleaner look. Remember to label these pieces with tape to remember which piece goes where.
- If you can’t take items out of the room completely, push them to the center of the room. This will still give you more space to work with.
- Tie up any loose wall cables that cannot be removed from the area and cover them in plastic bags. This way, they’ll be safe from drips and won’t get caught on the legs of your step ladder.
Repair and Clean Surfaces
Once your area is empty, it is time to pull out the magnifying glass. Does your room have any areas that need to be repaired? How are your baseboards looking? Any dings or dents that you notice now will definitely stick out if you neglect fixing them before your paint job. A small bit of spackle and a putty knife will fix up most common drywall problems. If things are in tip-top shape, you can move onto cleaning your surfaces. You’d be surprised at just how much dirt and grime can accumulate on your walls over the years. Reach into the corners and swipe at those cobwebs. Then, dip a sponge into a mixture of water and mild dish soap before gently wiping the walls.
- Use a long-handled tool, such as a Swiffer with an extension rod, or a step ladder to reach the places closer to the top of your walls. Safety is essential!
- Make sure your walls are completely dry before you start painting. Whether you end up adding a bit of spackle, or just need soap and water, give your space plenty of time to dry.
- It is essential to take care of any mold or mildew before painting. It is never a good idea to paint over mold. And remember: gloves and a mask are essential equipment for this job!
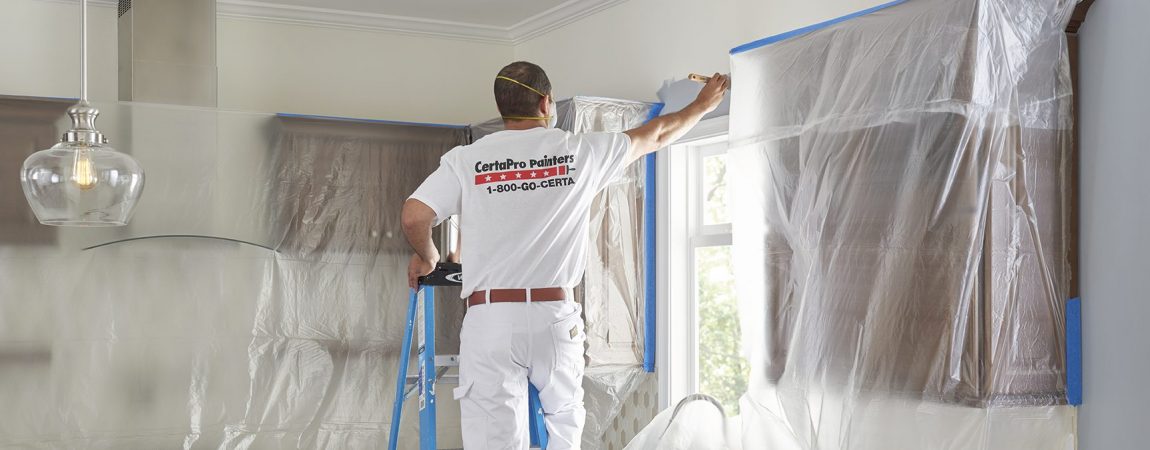
Lay Down Protective Covers
While your furniture should be out of the room or in the middle of your space by this point in the process, there are some things that just have to stay, such as your carpet or flooring. Cover any remaining surfaces with drop cloths. Then use painter’s tape to get a cleaner edge on surfaces of the walls that will not be painted, such as baseboards, window trim, or built-ins like fireplaces or bookcases.
- Firmly press your painter’s tape down with your fingers or a putty knife to prevent paint from seeping under the tape. You want to make sure the entire row is completely sealed.
- Many people prefer to paint barefoot. That way, you know if you accidentally step in paint and will be less likely to drag it throughout the house with you.
- Remember to put tape over any switches or outlets you previously uncovered to keep those exposed areas clean.
Set Up Your Station
Now that your room is fully ready, it is time to get yourself prepped. Find a space in your paint-ready area that is easily accessible and comfortable. Here is where you can lay out your paint rollers, brushes, paint cans, and any other messy materials. Haul in your step ladder and a trash can as well so you’re not running around your home throughout your process. Keeping your space organized throughout the painting process will help you stay stress-free and safe!
- It is always good to have extra materials close to your painting area. Keep your painter’s tape, extra brushes, and wipes within arm’s reach!
- You may want to place your materials on a sturdy table. Just make sure this table is one you are okay with getting a little (or a lot) messy!
- When you prep a room for painting, you want the space to work best for you. Don’t be afraid to adjust things as you gain more experience painting in your space.
Need Help to Prep a Room for Painting?
There is a lot of work required to prep a room for painting. If you’re feeling overwhelmed or second-guessing your DIY ability, we’re here to help! When you work with CertaPro Painters®, there’s no need to stress about covering floors, furniture, and outlets. The pros already have the process down to a science. The local painters at CertaPro Painters® will work with you to make sure all your preferences are met and the work is completed in a timely fashion. We do painting, so you can do life. Call our team or fill out our no-obligation form for a free estimate.
