
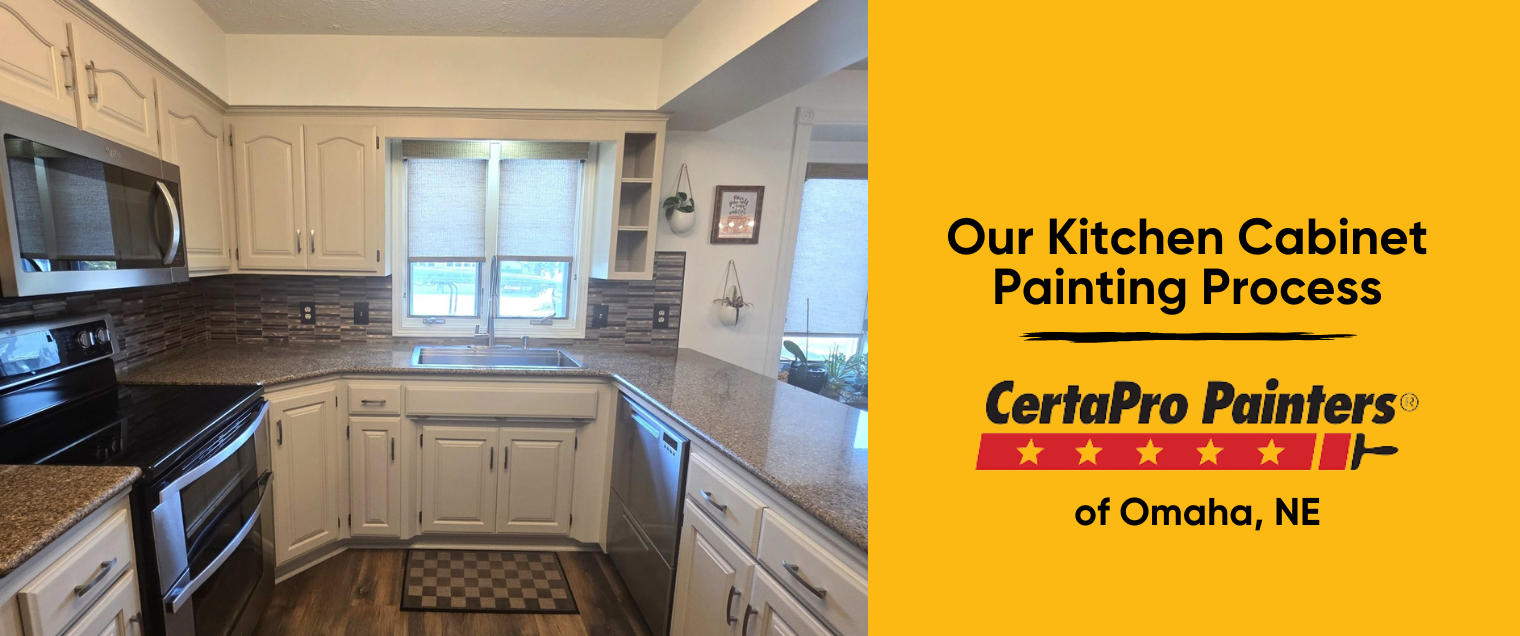


Repainting your kitchen cabinets is one of the most cost-effective ways to completely transform your space. Here’s exactly what you can expect when you choose our professional cabinet painting process—from the first call to the final reveal.
Step 1: Schedule Your Complimentary Cabinet Painting Estimate
It all starts with a free, no-obligation estimate. During your consultation, we’ll walk you through:
The overall cost (often far less than homeowners expect—and significantly cheaper than replacing cabinets)
How long your cabinet painting project will take
How to prepare your kitchen before we begin
Available scheduling options to fit your timeline
Once you decide to move forward with the most-referred painting company in the Greater Omaha area—with over 25 years of experience—it’s time to move on to the fun part.
Step 2: Choose Your Perfect Cabinet Color
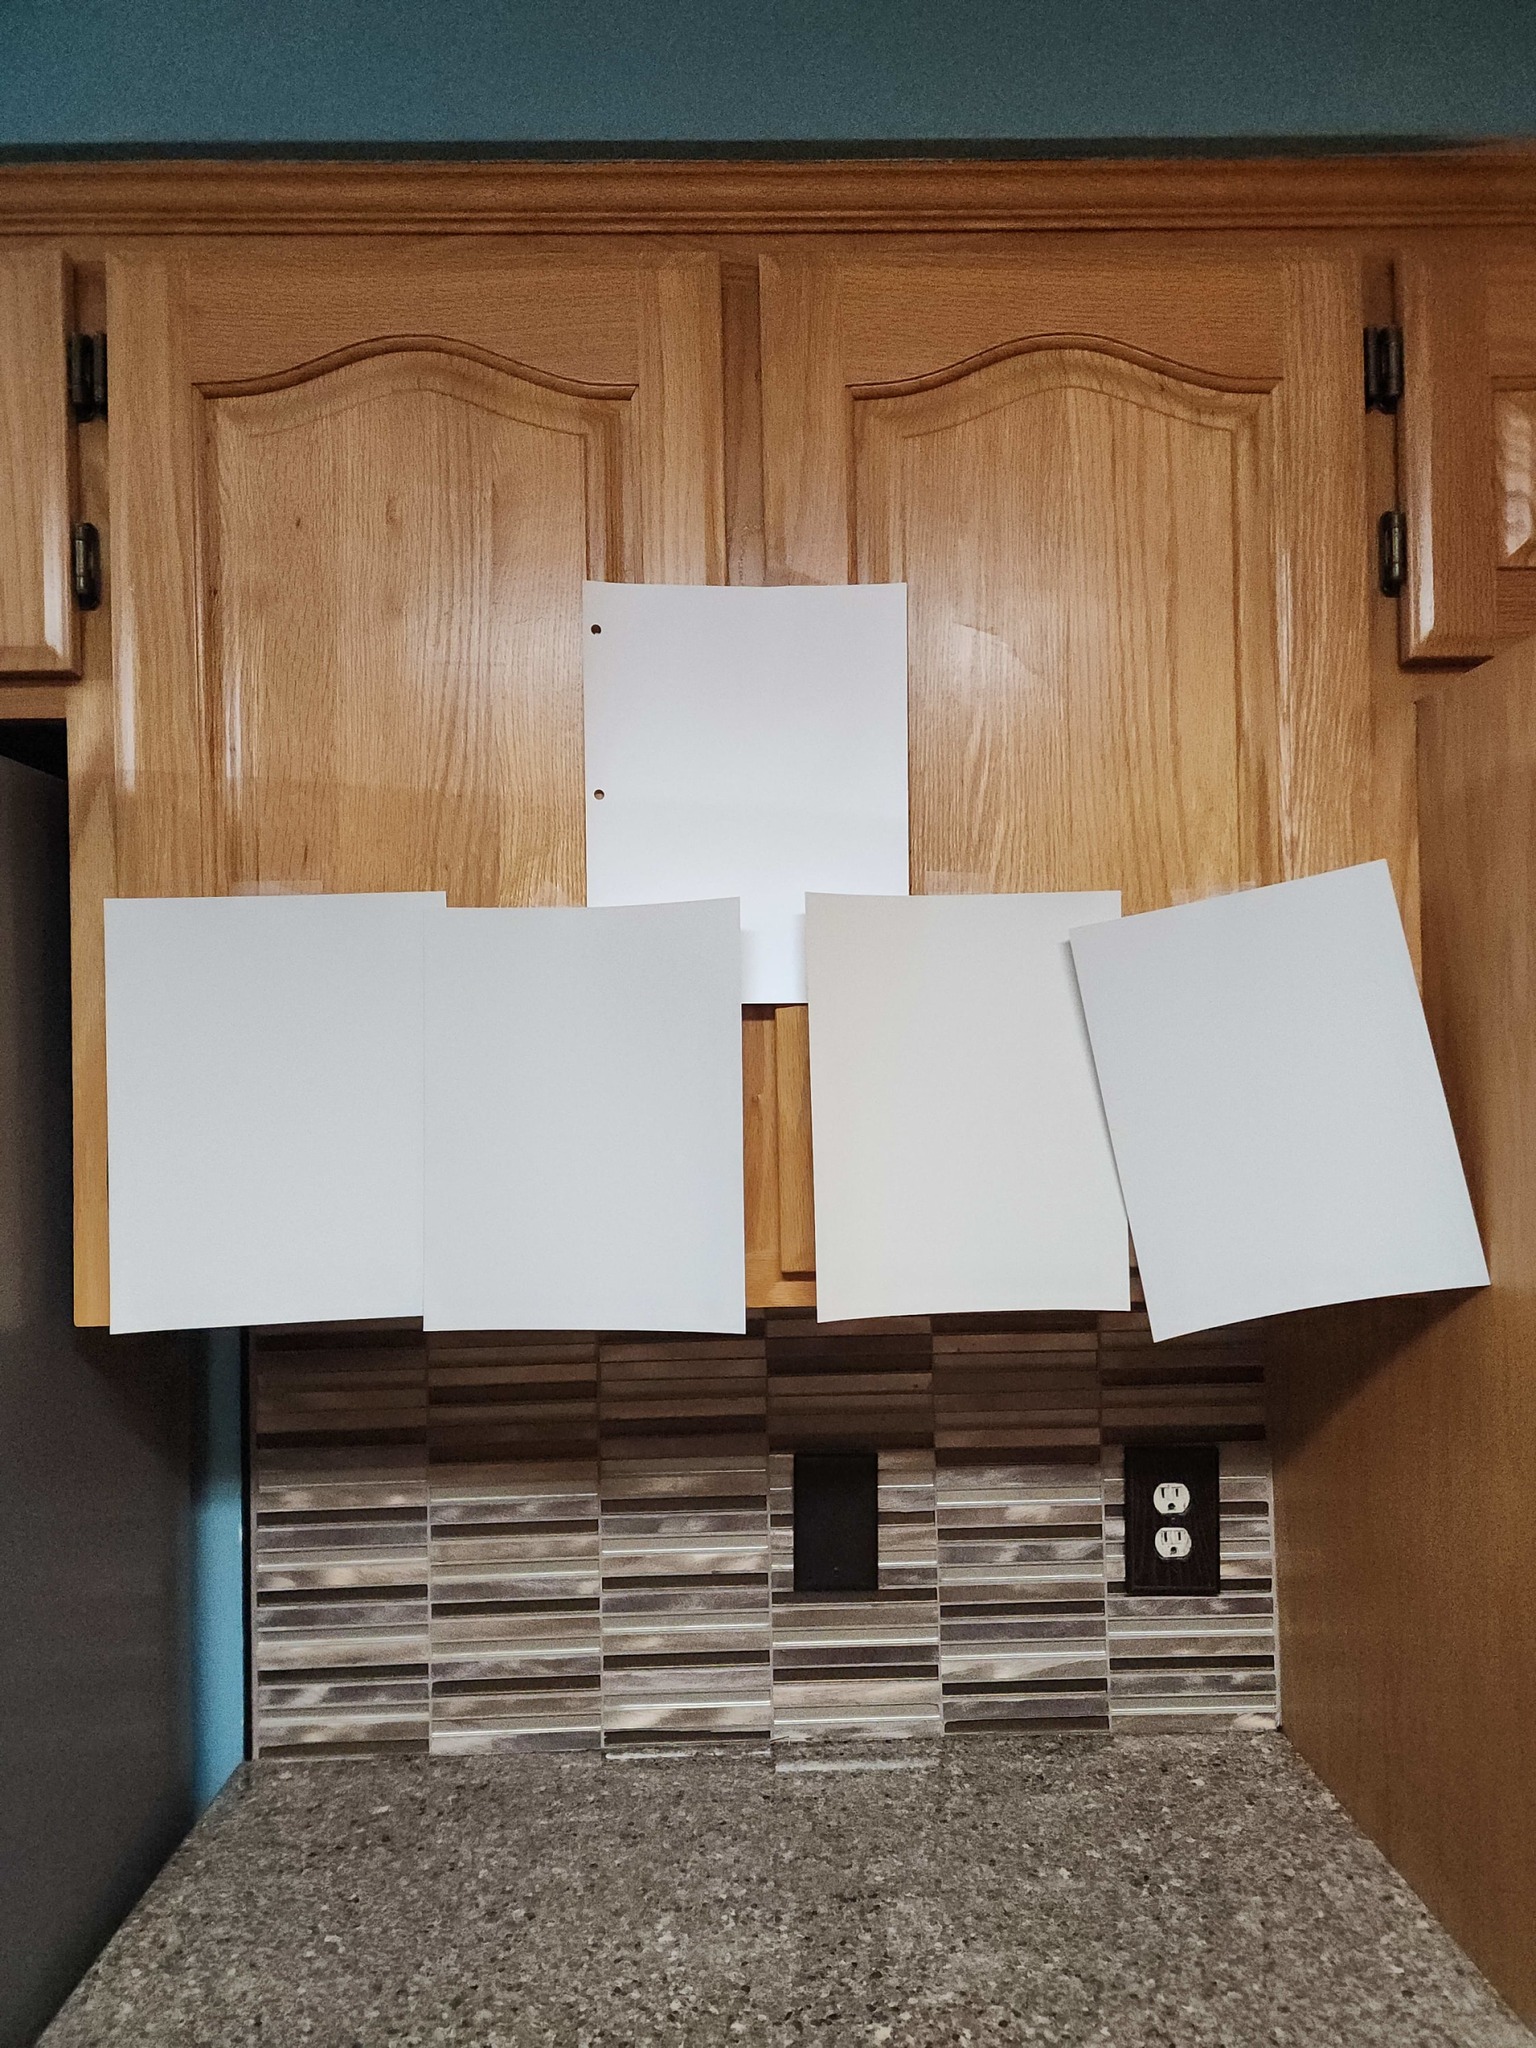
Every cabinet painting project over $2,500 includes a complimentary color consultation. Our color experts will help you:
Narrow down the perfect color palette for your kitchen
Review large sample options
Test Sherwin-Williams Color-to-Go quarts directly in your space
Lighting, flooring, countertops, and backsplash materials all affect how a color looks. We take every detail into account to ensure your cabinets look flawless in your home—not just on a paint chip.
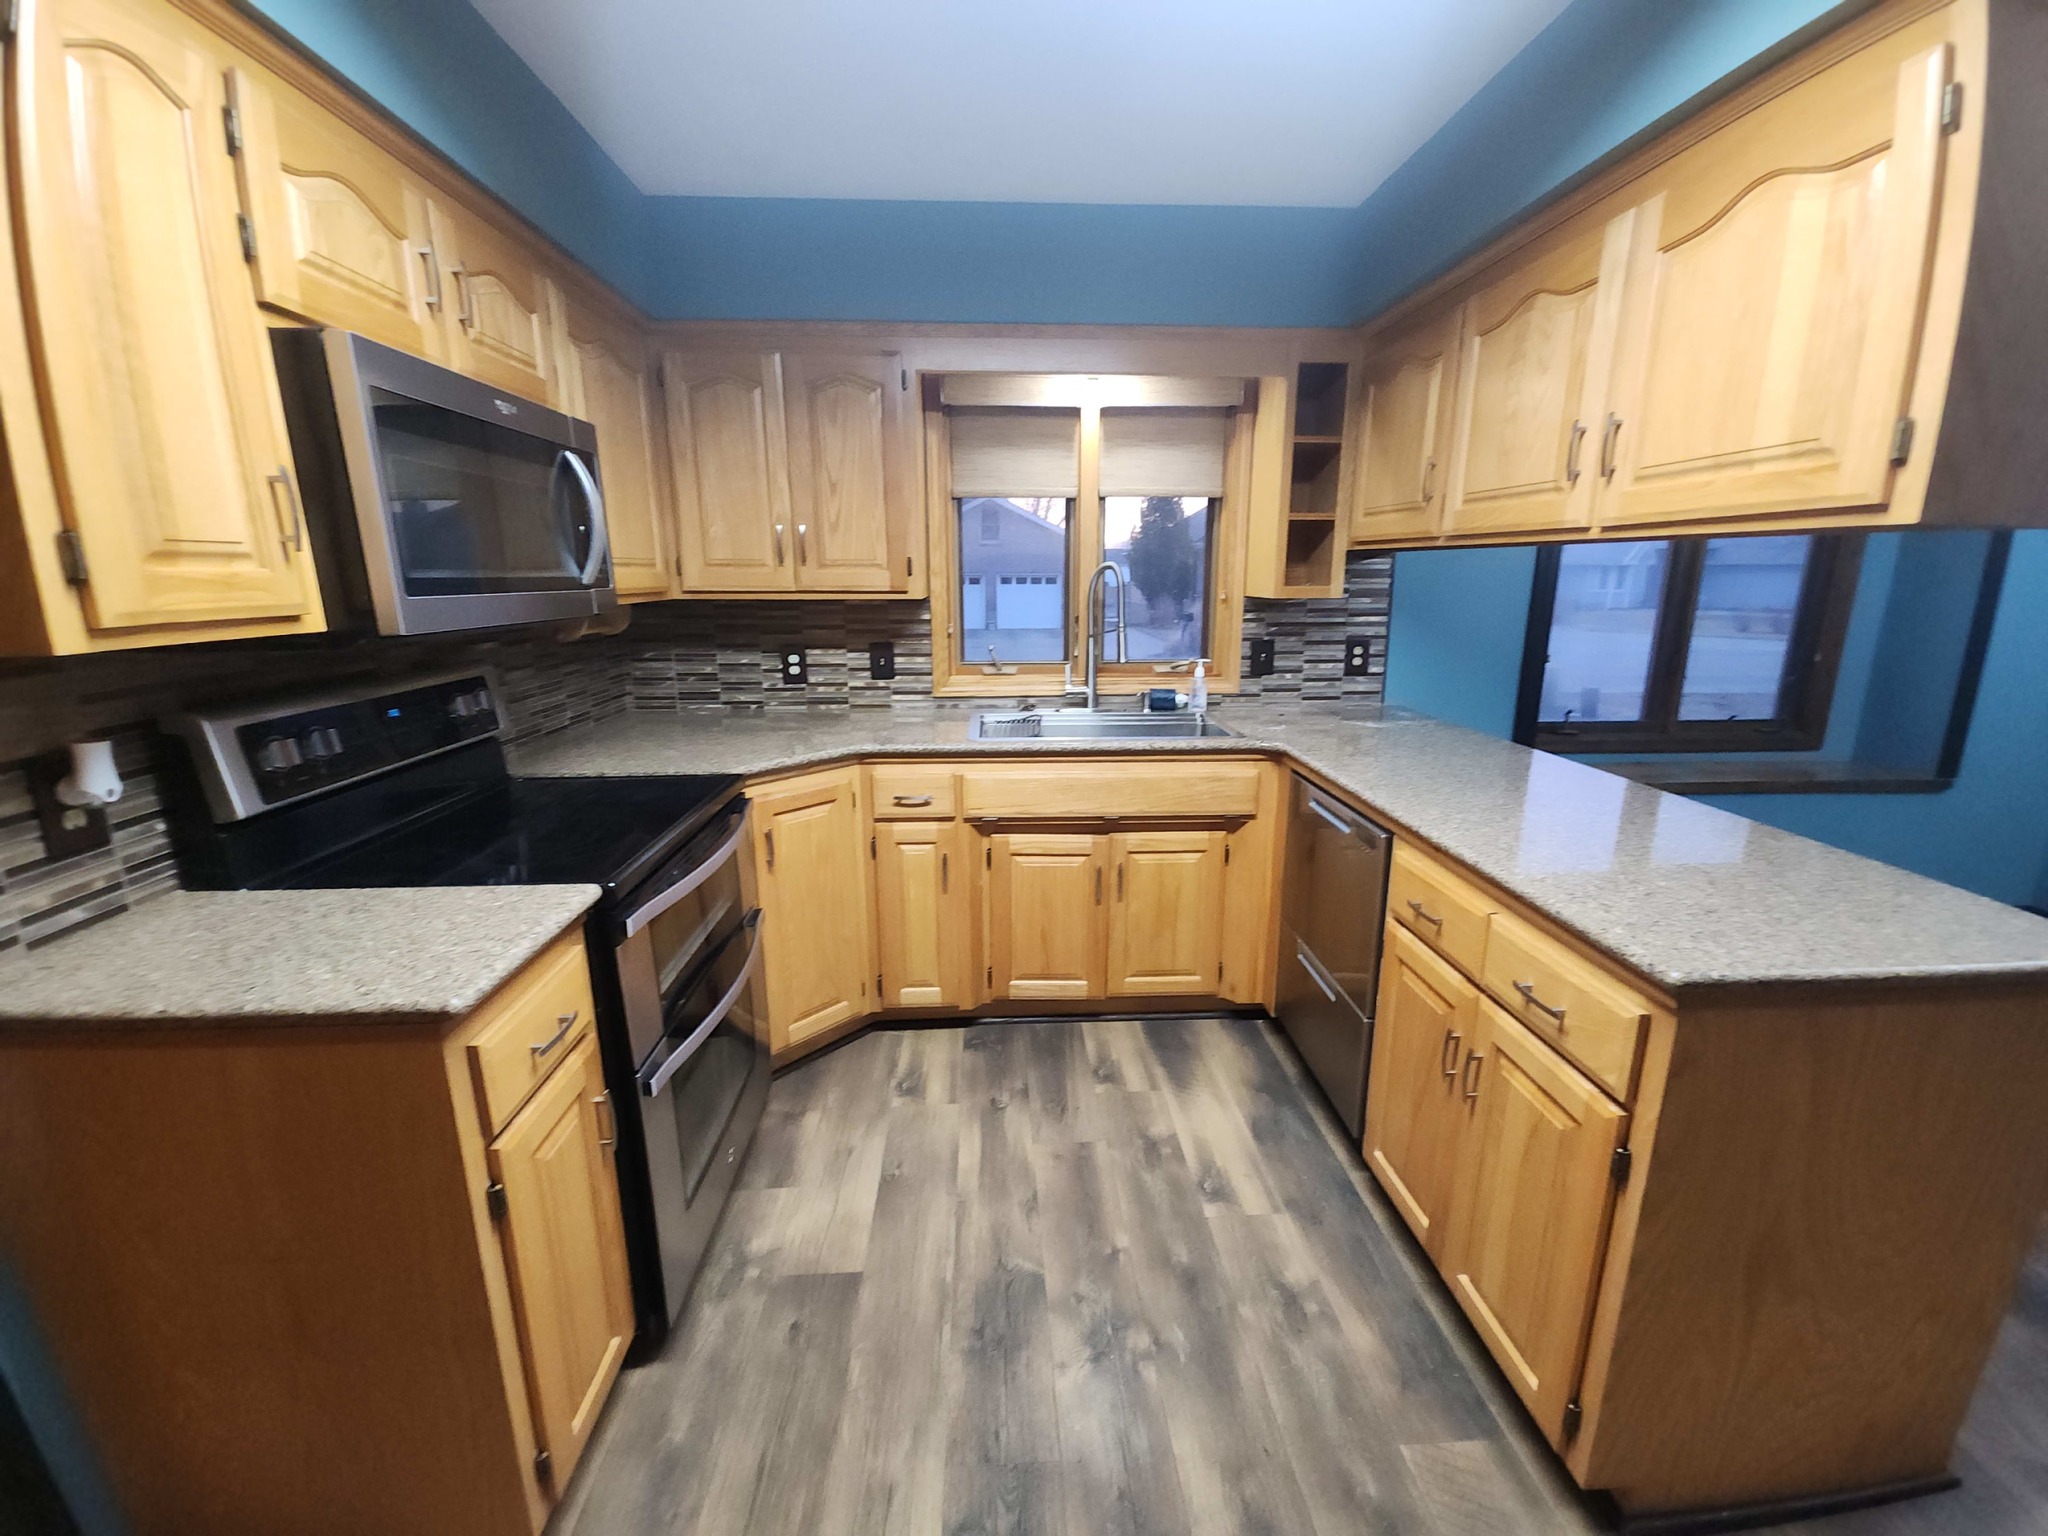
Step 3: Painting Week Begins
On your scheduled start date—typically a Monday—our professional cabinet painting crew arrives ready to work. Most cabinet projects take about one week to complete.
Here’s what happens first:
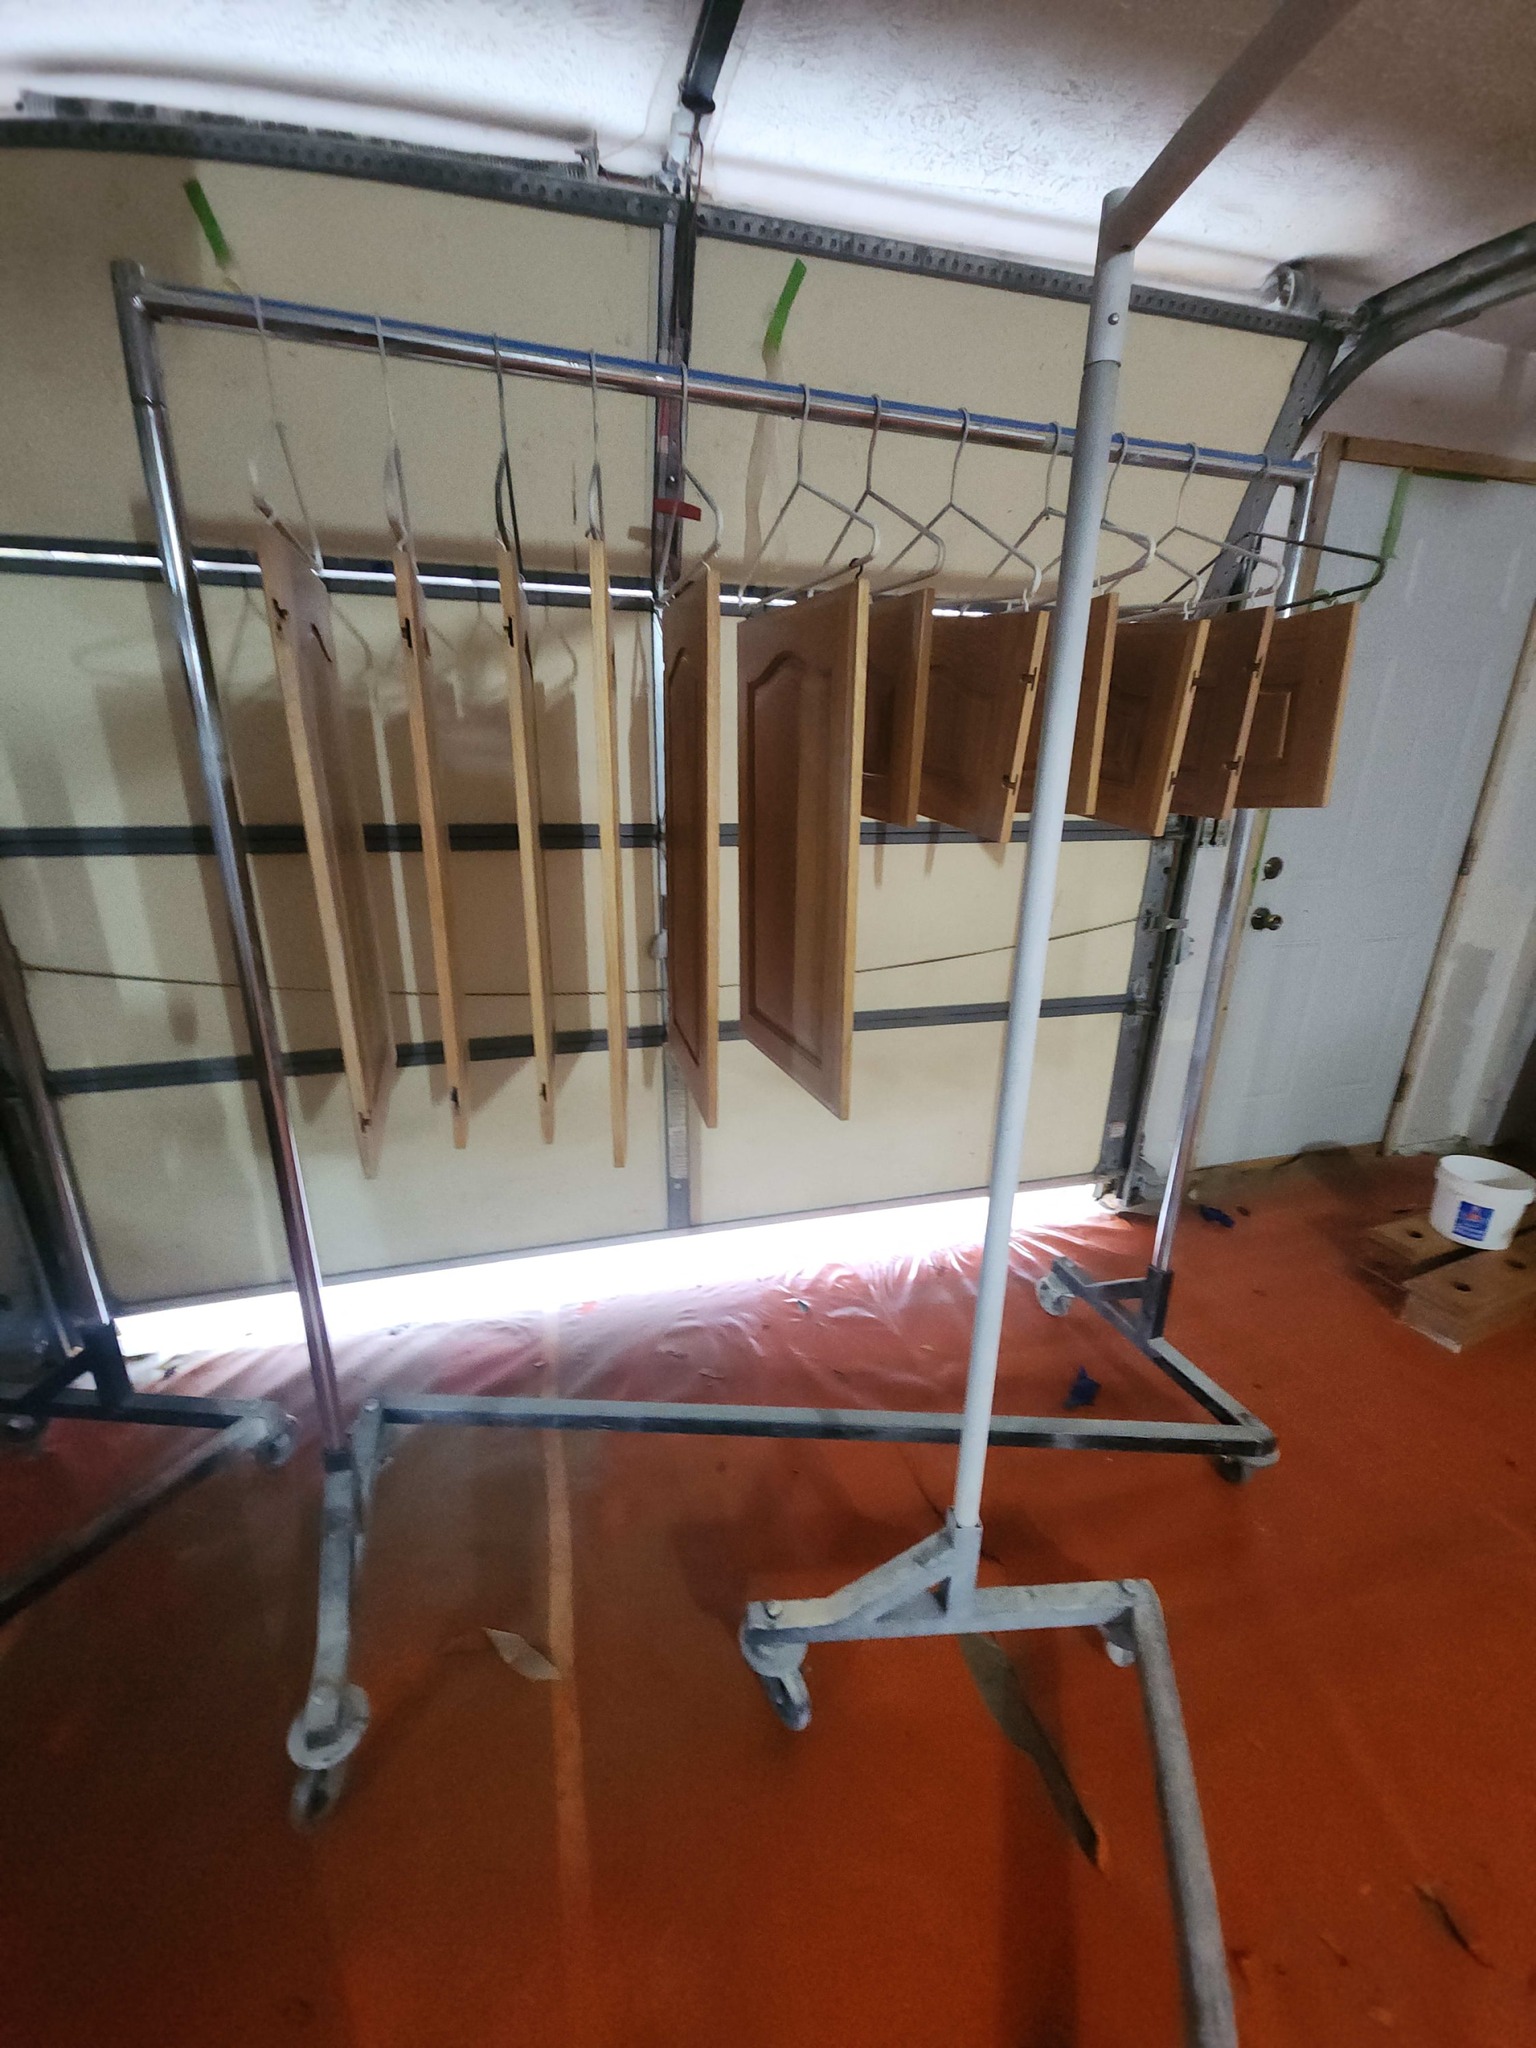
All surfaces are thoroughly cleaned and wiped down
Cabinet doors and drawers are carefully removed
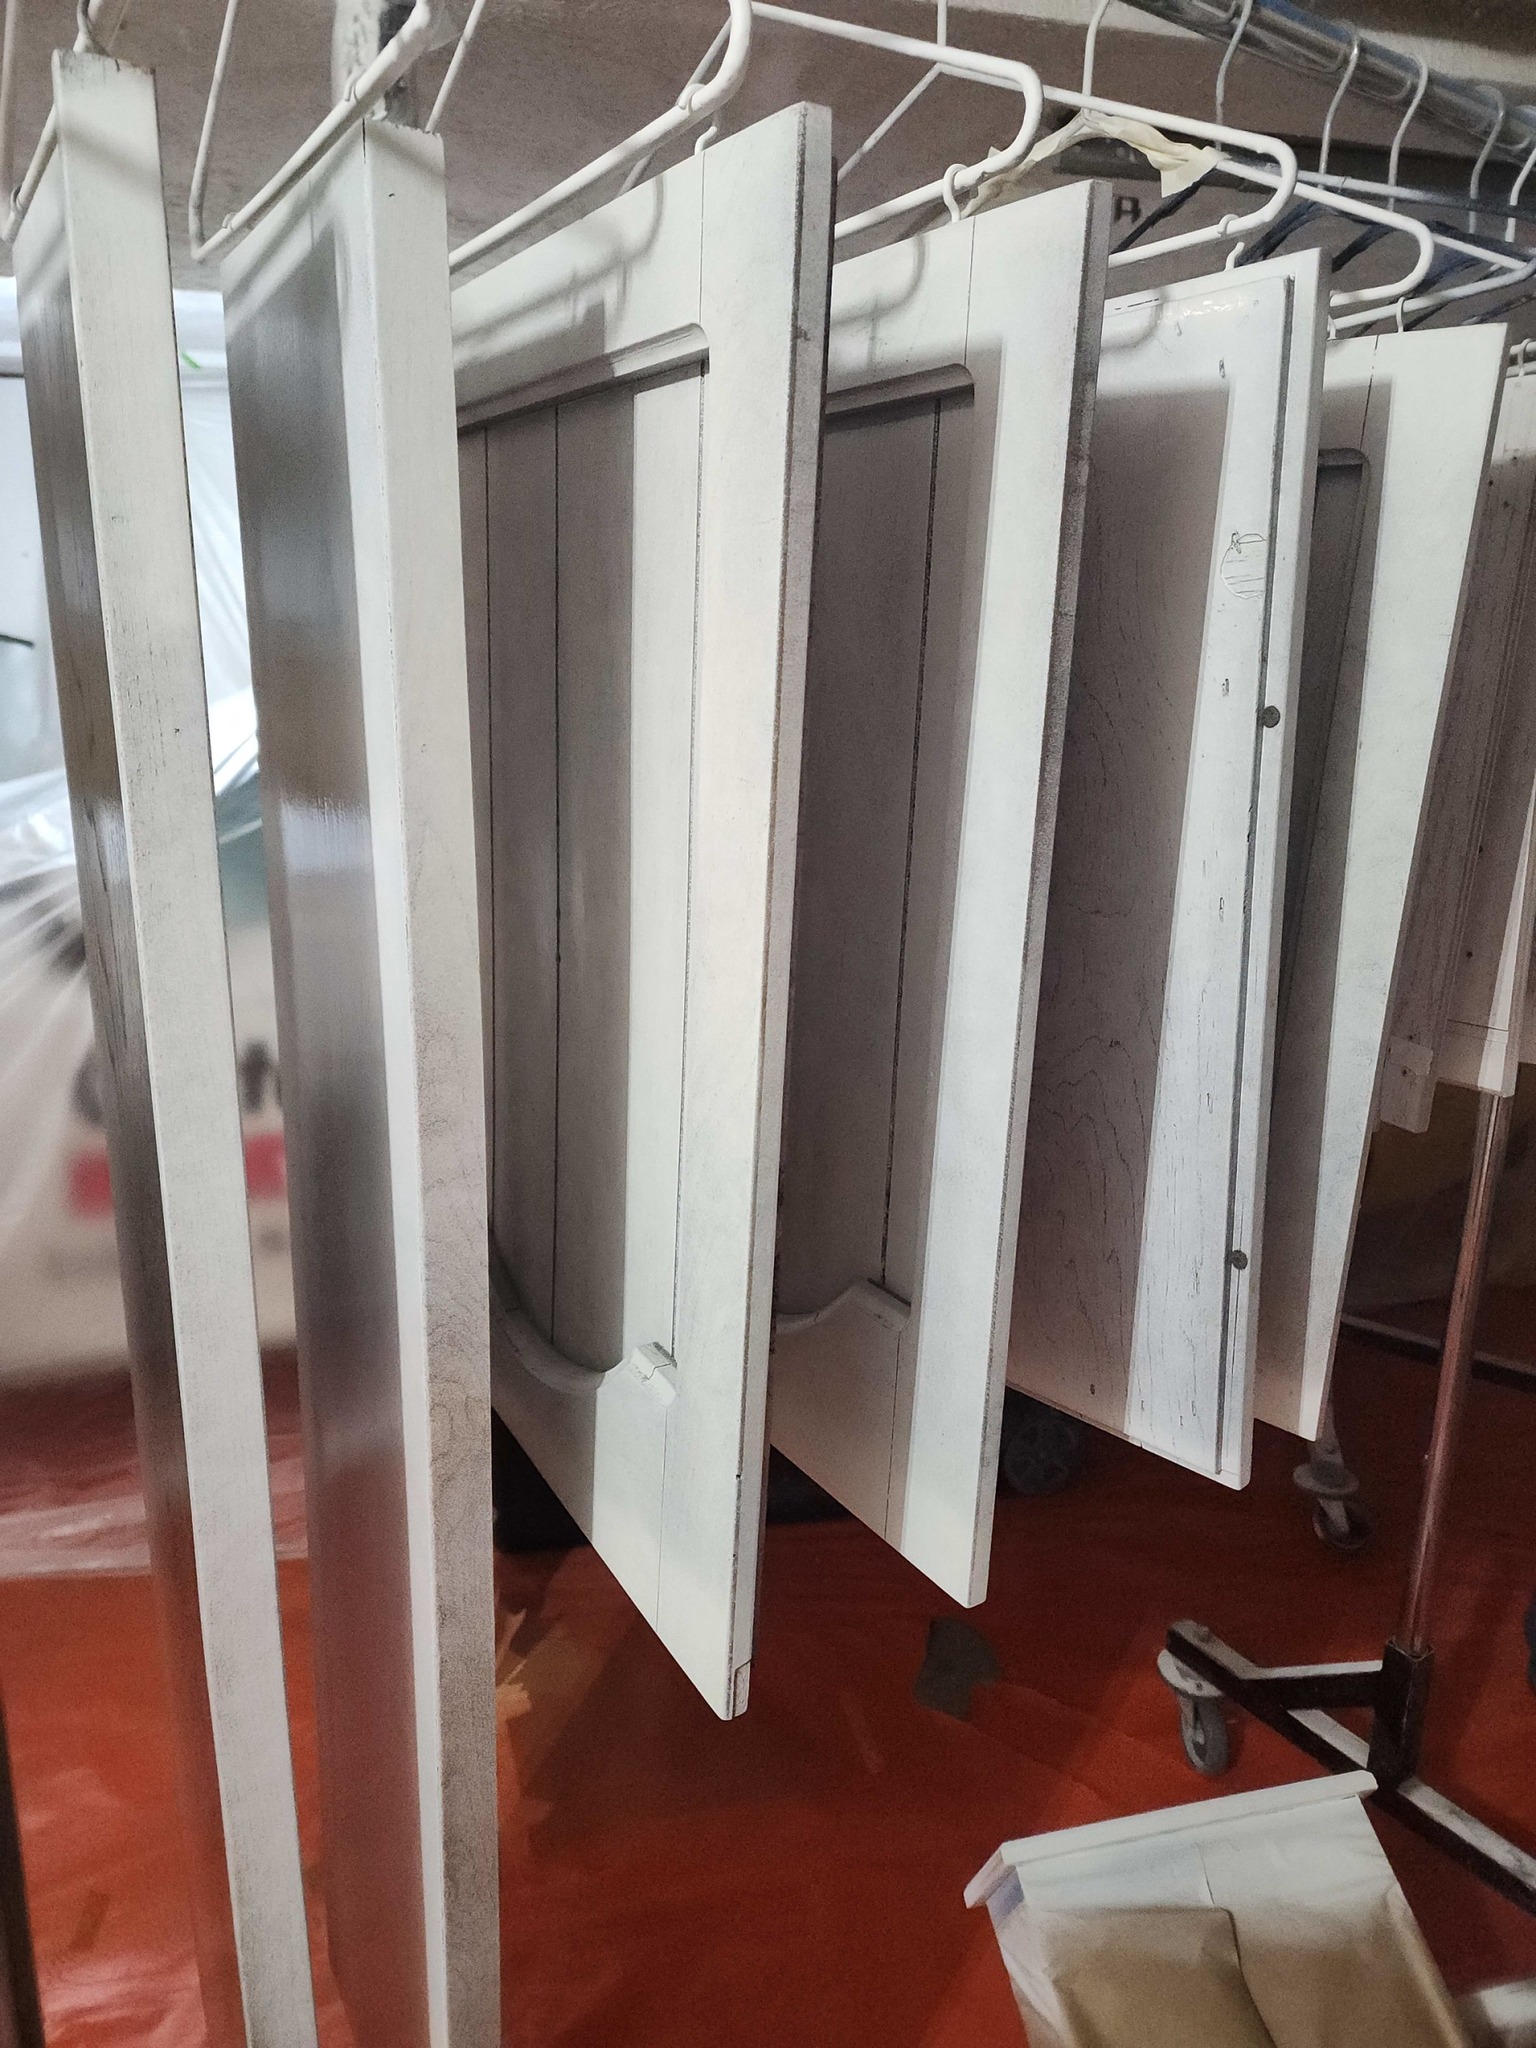
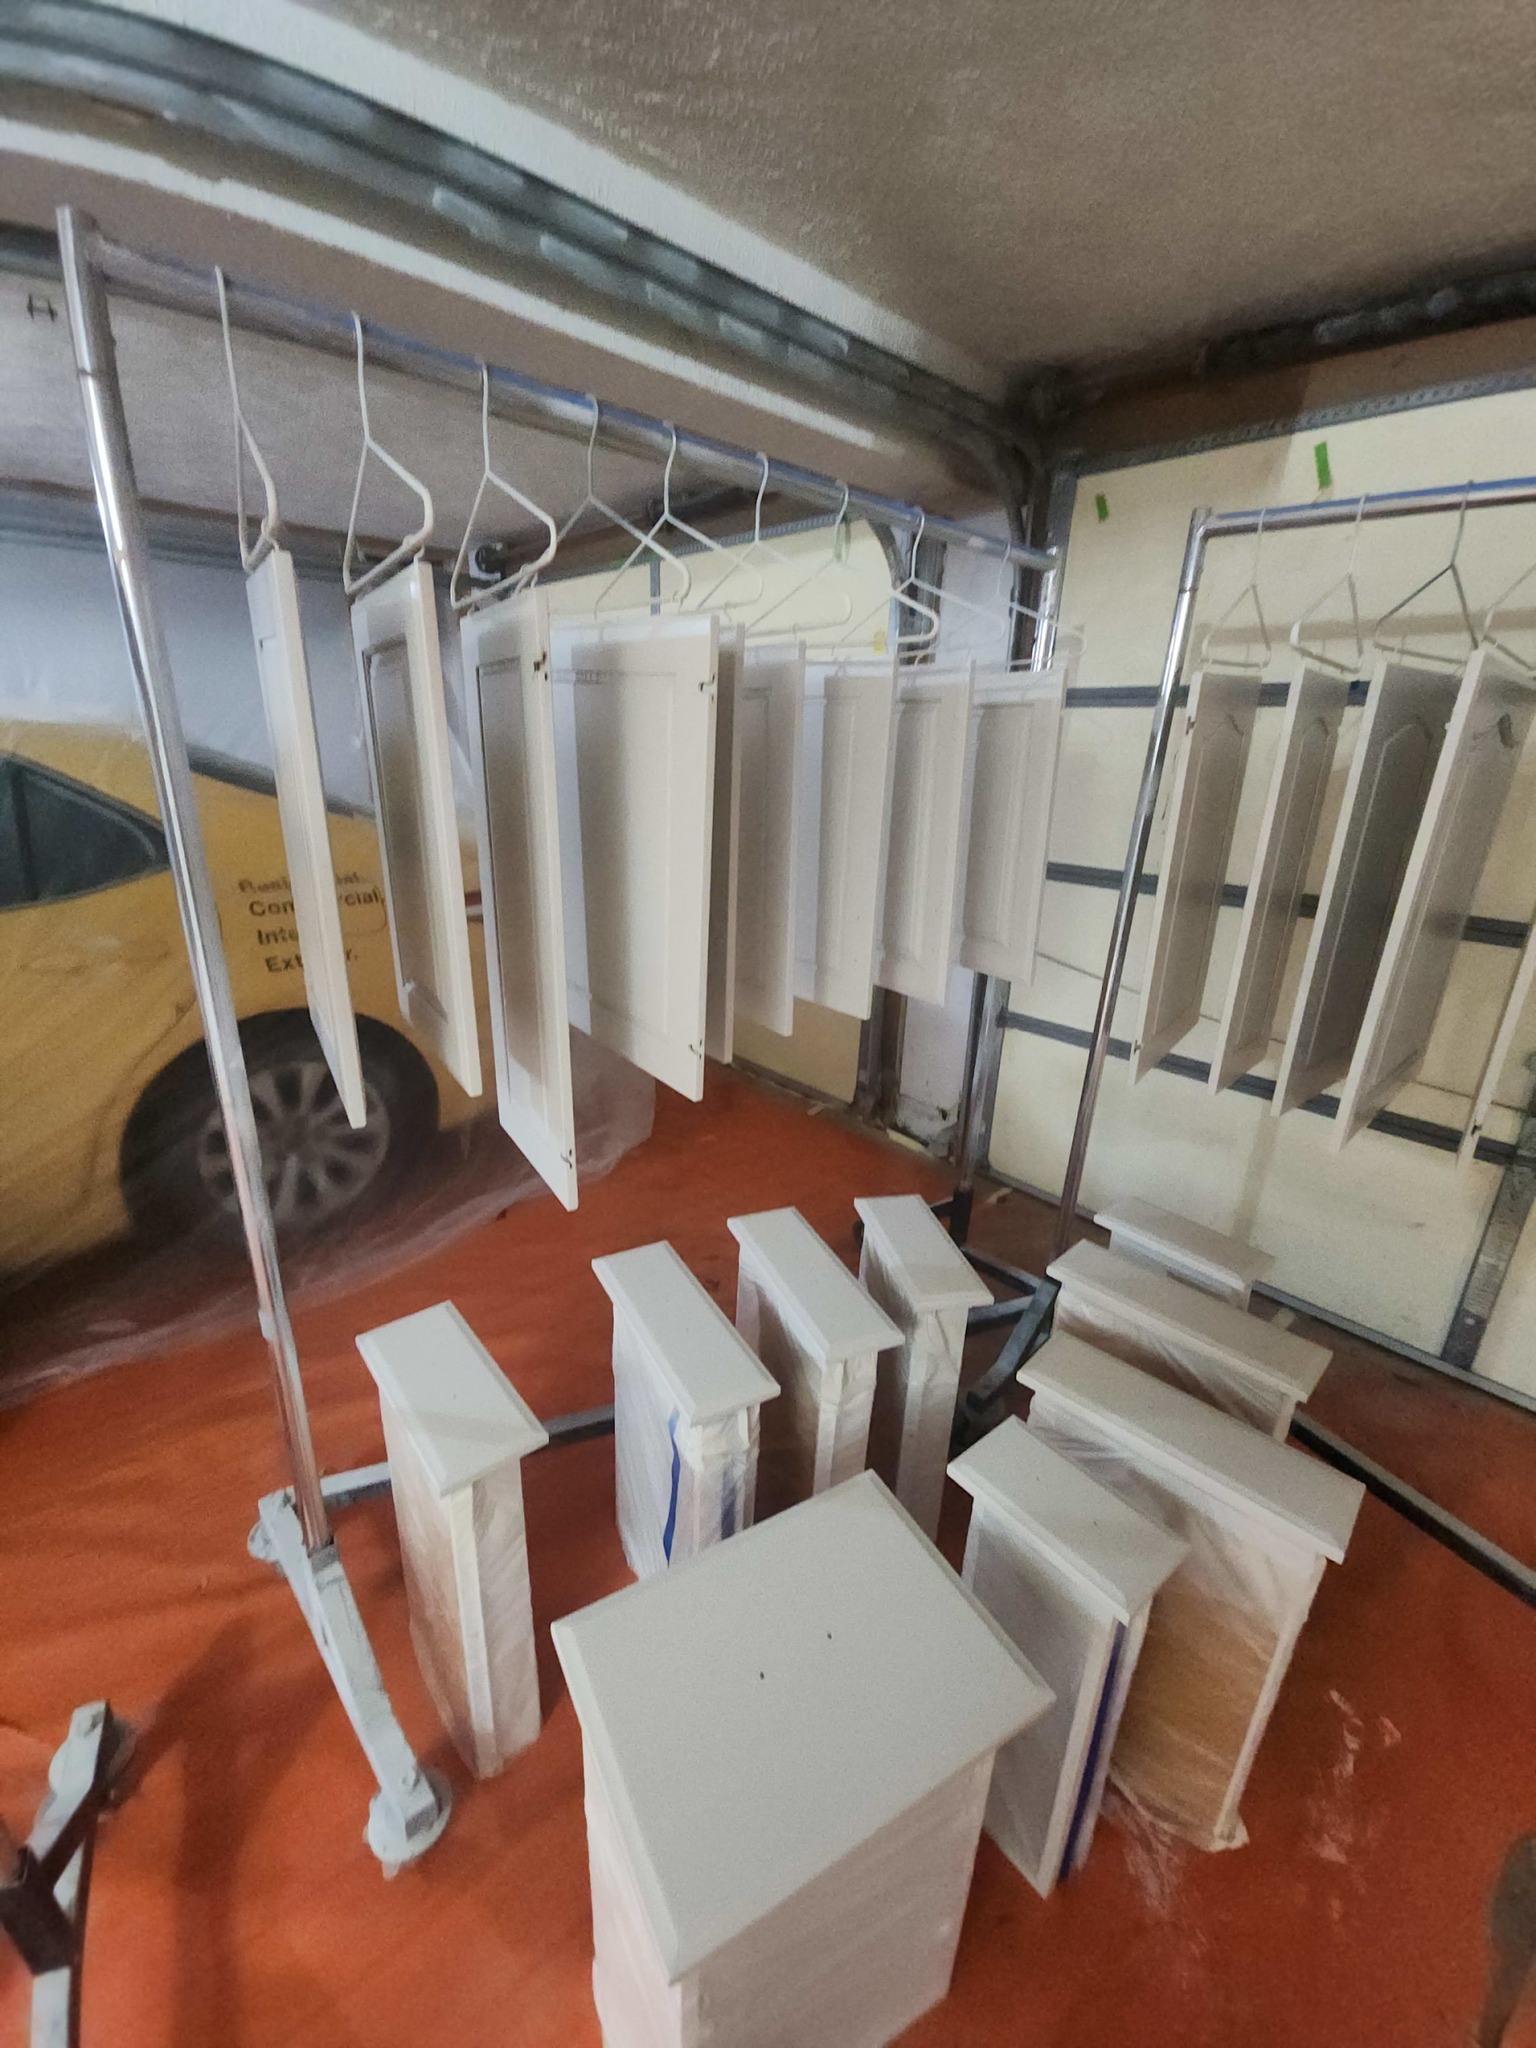
A professional spray booth is set up in your garage (usually requiring two bays)
Floors, countertops, backsplashes, and cabinet interiors are fully protected
Preparation is key to a beautiful, long-lasting finish.
Step 4: Prime Time
With everything prepped, we apply high-quality primer—the foundation of a durable, factory-smooth finish.
Primer is sprayed on for an even, professional look
Cabinets are scuff-sanded between coats to ensure proper adhesion
Each surface is inspected to ensure a smooth, consistent base
This step ensures your final color looks flawless and stands the test of time.
Step 5: Painting & Reassembly
This is where the transformation truly happens. We apply two finish coats of Sherwin-Williams Emerald® Urethane Semi-Gloss, sprayed professionally for a sleek, factory-quality finish.
Each coat is carefully applied and allowed to cure, creating a durable surface that holds up to everyday wear and tear.
On the final day, we:
Remove all protective paper and plastic
Reinstall cabinet doors and drawers
Perform a thorough cleanup and final inspection
Everything is put back exactly where it belongs—only better.
Step 6: The Big Reveal

The moment you’ve been waiting for. After a week of detailed prep, expert painting, and precision craftsmanship, your kitchen is completely transformed.
Fresh color. Flawless finish. A “new” kitchen you’ll love walking into every single day.
Ready to Get Started?
