
How to prepare a wood house for exterior painting
Posted on May 31, 2021


You might think that painting a wood-clad house is just a matter of getting a ladder, some brushes, and some paint and off you go, but any professional painter will tell you that most of the work is in the preparation.
Wood is a very common exterior cladding for homes, it’s easy to work with, durable and affordable so why not use it? It’s also naturally porous and makes a great material to apply paint to. The paint’s primary job is to protect the wood so that it lasts, but occasionally, for a lot of reasons, this partnership fails.
Ideally, you want to repaint your house before it starts showing signs of paint failure because at that point the prep work is about to increase quite a bit. The first step any painting contractor will take when giving you an estimate is to conduct a walk-around of your house to see what condition the paint is in now.
In some severe cases it might be obvious, even without getting close to things like fascia boards, that wood is going to need to be replaced. Visibly rotten wood will almost certainly have areas where the paint has simply fallen off and underneath it, you will see dark brown to black wood indicating it’s already rotting. At that point, it’s going to take some carpentry skills, tools, and new replacement wood installation before the paint job even gets started. Additional damage may be caused by tree sap, bird droppings, woodpecker holes, impacts, and insects.
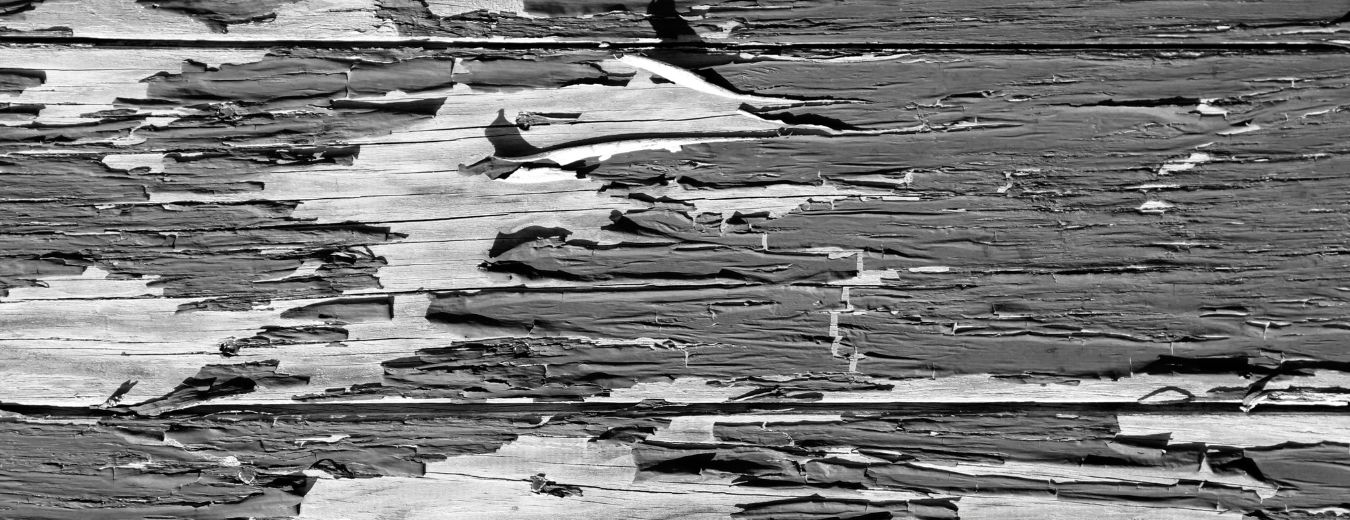
For less severe situations it will likely be the case that the paint is just showing signs of fading, cracking, and checkering. These are all signs that it’s time to repaint after some good prep work.
The prep work usually starts with a power washing using water and a cleaning agent like trisodium phosphate (tsp). This chemical cleans the paint surface, cuts grease, and removes any glossy areas that would make a new coat of paint difficult to adhere to. The point isn’t to use the power washing as a method to blow off the old paint, that only infuses the wood with water and makes things worse.
The goal is to simply get it clean enough so that the majority of the surface can be ready to paint and the bad areas are more clearly revealed.
Once the power washing is complete the painters can begin to look for areas of your wood exterior that are having problems. When an area is found that has peeling paint the painters will scrape and sand the surface until they have revealed an area where the new paint can adhere to.
The wood that’s exposed may turn out to be very stringy indicating early rot and these areas will need to be scraped until solid wood is found. For small areas, wood filler can be added to wherever material has been removed and then sanded to provide an even and porous surface.
Every area on the exterior that is suspect will need to be either scraped, sanded, or brushed with a wire brush to get beneath the failing paint so that the condition of the wood can be determined. The ultimate goal is to find and removed even the smallest areas of bad wood. It’s quite common to find wood issues on the trim especially since the exterior walls tend to let water roll right off. Anywhere you have angles, corners, and detail you have places where water can collect for a little bit longer than other areas so these places get added scrutiny.
One of the things a professional painter will be on the lookout for is WHY certain areas are failing and where the source of the wood rot is coming from. Occasionally drainage issues, leaky gutters, or other causes can be identified and addressed at the same time to make sure the problems are solved for good.
As part of the scraping process, any failed caulking in seams around trim, corners, and windows will be scraped out. Fresh caulking will then be applied and allowed to dry to create a really tight seal around the edges, window, and door frames.
Once the wood exterior is power washed, scraped or sanded, patched, and then caulked, primer is applied to areas of exposed wood. Primer serves as a middle layer between the wood and the coat or coats of paint to follow. Any replacement wood siding or trim will also be primed before painting. Most primer dries within an hour or so and can then be painted over.
Are we ready to paint that wood now? Yes, we are but you can see that the prep involves quite a bit of work and a thorough inspection of every area of your exterior. This explains why the prep can easily take longer than the actual application of paint. Painting over problems is not an option if you really care about your house and true professionals won’t cut corners to speed up the process.
If you have your exterior repainted by professionals like the pros at CertaPro of Northridge-Grenada Hills and the first two days don’t end with any paint applied, don’t worry, it just means that there is a lot of prep work going on but the end result will be a paint job that will last a good 10 years or more depending on the climate and a few other factors.
If you’re reading all of this and thinking that the process is more involved than you thought and now you’re having second thoughts about trying it yourself that’s understandable. It’s not uncommon for professional painters to come to the rescue of a DIY attempt that failed.
When it’s time to repaint your house and you live in the Northridge California area give the nation’s top professional house painters a call at CertaPro of Northridge-Grenada Hills at 818-714-7004 and let them provide you with a free estimate today, your wood house will thank you!
