
Tips for Installing Epoxy Garage Floors
Posted on May 28, 2021


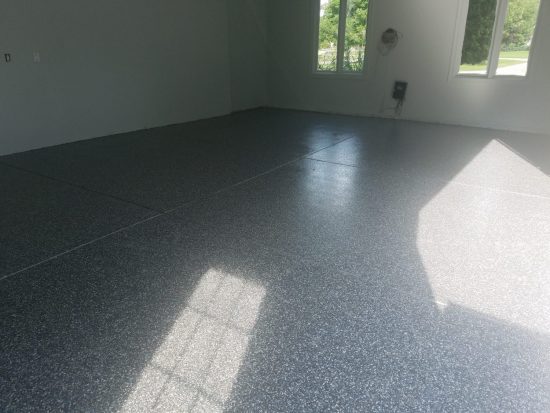 An epoxy or polyurea floor will dramatically improve the look and functionality of a garage floor. It helps protect the floors, prevents deterioration, and prevents stains. It will give your garage the finished showroom look. We have been helping homeowners in Madison with garage floors for several years. Customers often ask us what to expect, how long it will take, and what the process is like. This post will outline the general process for applying an Epoxy floor in a residential garage.
We highly recommend you hire a professional crew for epoxy floor projects, there is nuance and heavy machinery involved. If you are not confident in your skills, contact us to set up a free estimate appointment to get pricing information.
The below outline is a process we suggest for people doing DIY floor installations. Professional crews have access to more products and equipment that change the process. Contact us if you would like us to evaluate your floor and provide an estimate for professional installation. Be sure to also check out our Floor Coatings section on the website, we have dedicated floor coatings teams on staff. We can help with garage floors in the greater Madison, WI service area which includes Cottage Grove, Madison, Middleton, Monona, Mt. Horeb, and more. See the list of areas served on our home page for information about the towns we serve.
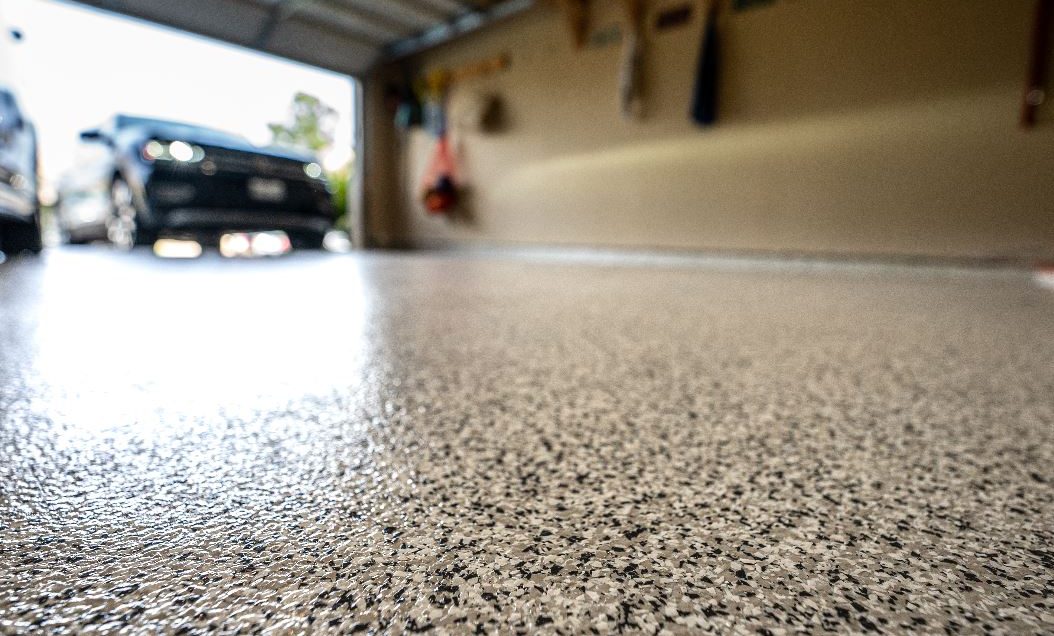
Garage floors tend to be abused and nasty concrete, often stained with the marks of oil changes past. An epoxy coating will protect it and give it a nice finish.
Check for Moisture
Check your concrete slab for moisture issues. If it was originally poured with no vapor barrier or the water table is high, it’s possible the water will lift the epoxy from the concrete. Tape a 2 inch x 2 inch piece of clear plastic down to the floor and leave it for 24 hours. If there is a water issue, the concrete will show moisture, darkness or droplets. Then it’s a good idea to consult a professional.
Tools Needed for Epoxy Floors
You’ll need to get a 2-part epoxy kit that includes concrete etch and surface flakes. It should also contain a degreaser, floor patch, scraper, squeegee, spackle knife, painter’s tape, roller, bucket, litter and a carbon-filter mask.
Clean the Concrete
The first step to a good outcome is a good cleaning. Sweep up all dust and debris from the floor, less it will be part of your epoxy permanently. Be sure to get against the walls, in corners and along door tracks.
Degrease the Surface
Scrape up any hardened piles of garage stuff. Use degreaser to remove stains from the floor. For really stuck on stains, alternate between full-strength degreaser and clay cat litter to pull up the oil.
Wash
Now that the really troublesome stains are removed, the entirety of the floor should be washed with a diluted degreaser. Don’t overwet the floor. Use a squeegee to remove the standing water and give the floor a chance to dry.
Etch
Use warm water to mix the citric acid according to your manufacturer’s included instructions. Put it down on the floor, scrub and squeegee again. This opens the concrete pores for good adhesion. We often use a diamond grinder at this step to even out the surface.
Dry
Use fans, open doors and windows to allow the floor to completely dry.
Test
Was your floor sealed? Drip water on the slab. If it beads, there is a sealer on the concrete that could impede your adhesion. Repeat the etching process and test again. Do this until the water no longer beads.
Patch
Look at your floor for cracks. These will need to be repaired as they will show through the epoxy finish you put down. Mix your patch according to the instructions on the package. Fill the cracks, divots and issues in the floor with the spackle knife. Give the compound eight hours to dry, then feather the edges with a coarse sanding block.
Clean, Again
The floor will need one last cleaning before you can put epoxy on it. Sweep dust and messes up so they won’t end up part of your coating.
Prep
To make your cutting in easier during painting, apply painter’s tap along wall plates and frames you want to avoid getting epoxy on.
Mix
Mix your part A and B together. Pour the smaller can into the larger and stir. Mix the liquids together until it is one liquid.
Reaction
Depending on the ambient temperature, allow the epoxy time to react according to the container. It’s important to follow this step precisely, or you could end up with a big sticky mess.
Cut In
Put the epoxy mixture in a roller tray and use a cheap brush to cut in along the edges of the room. Don’t get too far ahead of rolling because the epoxy must be wet until the flakes are applied.
Roll Sections
Roll the epoxy in 4 x 4 foot sections. Keep the edge wet. Lightly shake flakes onto the wet epoxy. Plan an exit strategy so you don’t paint yourself into a corner, literally.
Go Thick
Put the epoxy on the floor in a thicker layer than you find necessary. Epoxy adheres by absorbing into pores in the concrete. Some of the layer will be absorbed into the floor itself. If it’s not put on in a heavy enough layer, it will lose its luster.
Flake
Sprinkle on the flakes from a high vantage and in a thin pattern of randomness. They will make the floor more attractive, and add a slip resistant traction to the final product.
Cure
Your floor is done. Wait at least one day, and up to three before it’s used for light foot traffic. Follow manufacturer’s directions for vehicle traffic.
