
DIY Epoxy Flake Garage Floor Coating Tips
Posted on March 31, 2023


Looking for a way to improve the look and feel of your garage floor? Consider applying an epoxy flake coating! This is a great way to add color and style to your space. In this article, we will give you some tips on how to do it yourself. Let’s get started!
Why Use Epoxy Flake Floor Coating?
Epoxy flake coatings are perfect for garage floors because they are extremely durable and resistant to abrasion, chemical spills, staining, etc. The flakes come in various colors, so you can customize the look of your floor to match your home’s aesthetic. Additionally, epoxy flake coatings create a slip-resistant surface that is easy to clean.
Preparing Your Garage for an Epoxy Flake Coating
Before applying your epoxy flake coating, it’s important to make sure your floor is properly prepared. This includes removing existing sealers or coatings from the surface and cleaning up dirt and debris. If your garage floor has cracks or chips, you’ll need to repair them before you can begin the coating process. Once all these steps are completed, you can apply an epoxy base coat and allow it to cure for 24 hours.
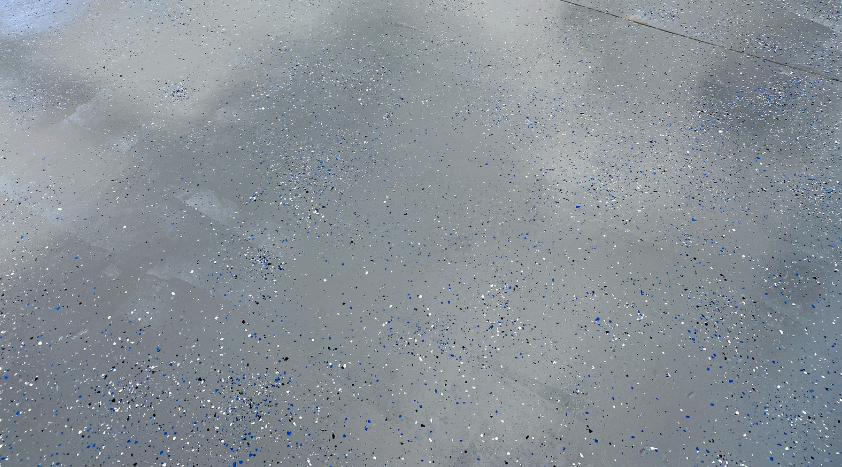
Applying an Epoxy Flake Coating
Once your base coat is cured and ready, it’s time to apply the epoxy flake coating. Begin by mixing the flakes with an appropriate amount of epoxy resin, then spread this mixture evenly over the surface using a trowel or squeegee. It’s important to work quickly and evenly to prevent any air bubbles from forming in the mixture. Make sure that each area is covered with a thin yet consistent layer of flakes to ensure that you get the desired finish.
After the flakes have been applied, leave them to cure for 24 hours before applying any additional coats. You may need to apply multiple thin layers to achieve a full-bodied look. This will help prevent areas from looking too thin or having visible patchy spots. Allow each layer to fully cure before starting on the next one, and take care not to overwork the area, as this can result in imperfections and defects. Once all your layers are complete, it’s time for the sealant coat.
Applying a Sealant Coat
A sealant coat helps protect your epoxy flake coating from various hazards such as UV light, water, and other elements. Applying a sealant coat over your epoxy flake coating is important as it ensures its longevity is preserved.
Begin by stirring the sealant until all components are evenly distributed, then apply one thin layer with a roller or brush in even strokes. Allow this to sit untouched for 24 hours before cleaning up imperfections or blemishes.
Cleaning Up Imperfections and Blemishes
It’s common for some areas of imperfection or blemish after applying a sealant coat, so it’s important to take care when examining and addressing these issues. If you find an area with air bubbles, scrape them off gently with a razor blade and patch them up with a fresh sealant layer. Similarly, if you see any small scratches or chips on the surface, you can use sandpaper to smooth them out before reapplying another coat of sealant.
Applying a Protective Topcoat
The final step in sealing your wood is adding a protective topcoat. This will provide extra protection from water damage and UV rays while giving your woodwork an attractive glossy finish. Start by stirring the topcoat until all the components are evenly mixed, then apply one thin layer using a roller or brush. Allow this to cure for 12 hours before lightly sanding the surface with a fine-grit sandpaper. Now you can apply a second coat if desired and then allow this to sit untouched for 24 hours before using your woodwork as normal.
Tips And Tricks
• Make sure to use a topcoat recommended for outdoor wood surfaces.
• When applying topcoats, work in long and even strokes, as this will help reduce the chances of bubbles forming.
• If you find yourself needing to sand between coats, use fine-grit sandpaper or steel wool and dust off the surface before applying the next coat.
• Before wiping down your woodwork with a cloth after each coat, let it sit for several minutes to allow any excess finish to dry. Otherwise, you may end up smearing it around instead of removing it.
• After every few coats, stop and inspect your work from multiple angles to ensure an evenly applied finish without any inconsistencies or mistakes.
• If you’re working with a wood finish that dries quickly, like shellac, rub the surface gently with fine steel wool between each coat to ensure an even sheen and texture.
• There may be some bubbling or other imperfections during the drying process; if this happens, lightly sand them out with fine-grit paper before applying the next coat.
• When your project is complete and fully dried, consider buffing it with a soft cloth for a flawless finish. This can help bring out the wood’s natural grain and make the color more vibrant.
Conclusion
Following these tips and using the proper materials, you can easily create a stunning epoxy flake garage floor coating in Madison, Wisconsin. The result will be a beautiful and durable new look for your space that will last years. With patience, effort, and the right supplies, you can quickly have an amazing-looking garage floor!
