
Steps to Paint a Room
Posted on July 14, 2020


A freshly painted room can give an old, tired room a new lease on life. Spend a little time with prep work and you’re sure to get a really great outcome. Here are 7 steps to paint a room like a pro.
Pre-prep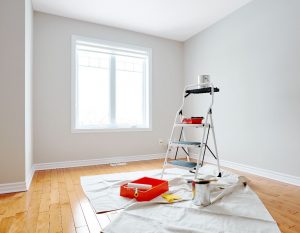
Free the space
Move all of the furniture to a different room. If this isn’t a reality, move it all to the center of the room and cover it with drop cloths. Nothing ruins a new paint job like a splatter of paint on the couch.
Do drop cloth
Drop cloths will save your floors and messy clean up later. A good drop cloth should be placed on the floor before any work begins, and overlapping each other by a good amount. It will move as you work and you don’t want to stop painting to fix a runaway drop cloth.
Hint: Always go canvas when choosing drop cloths. Plastic will get slippery and there’s a good chance you’ll step in paint, which will end up all over your floors. Canvas cloths will absorb small drips and protect your floors.
Switch switch plates
Take a minute to remove any hardware on the walls. Painting around switch plates and vent covers will just slow down the job. It will also look more professional at the end. Have a good look around the room and remove anything you can.
Prep the walls
Fix dings and damage to walls
Have a good look around the room. Find any cracks, bumps or nail heads that need repairing prior to painting. Use a lightweight spackle to create a good, flat surface before you begin painting.
Sand uneven surfaces
Sanding will help even out the bumps you found in the previous step. It also creates a good adhesion surface for the new paint you are putting on.
Clean up before
Sponge bath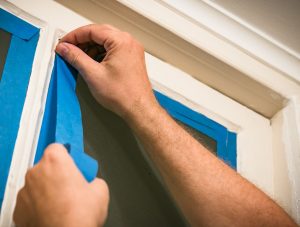
Painting over dust is going to end up giving you an uneven coat and potentially a textured look you were not trying for. Make a mixture of mild detergent and water to give your walls a quick sponge bath. You may be surprised at how much dust is actually sticking to your walls.
Tape tips
More than one home painter has been tripped up by using the wrong tape on their project. The wrong tape can pull up paint or allow paint to bleed behind it. Taping will take time, so don’t rush this step. The crisp lines left behind from painter’s tape and time cannot be faked.
Prime time
To prime?
If your walls are new drywall, priming is a must. Pros suggest priming is always a must. Primer will do three things to help your end result: block stains, allows one coat coverage, improves paint adhesion.
Hint: The paint pros tint their primer before painting with it. They mix in a small amount of the color paint with the primer. This helps the primed surface better cover with one coat of paint.
Painting party
Tip top
Begin at the top. If you are planning to paint the ceiling, now is the time. Start by painting any edges or parts that will slow you down. If you hit the edges of the walls, don’t worry, you’re painting there next.
Hint: Flat ceiling paint covers more flaws than glossy.
Wonder wall
Begin by painting the edges of any windows, doors or trim; a technique pros call cutting. Cut only one wall at a time, as you will want to immediately begin rolling it with the paint. If you cut the whole room at once, you can cause ‘flashing’ – when the cut paint dries differently than the wall paint.
Time to trim
Once your main area of walls are painted, allow a bit of time for them to dry before moving on. A semi-gloss paint or satin sheen is best for trim as it will allow for easy clean up on areas that are touched a lot. Be careful to catch drips and runs as soon as possible.
Drying
Dry and Decide
Give your paint a chance to dry completely, up to 8 hours before deciding if you need another coat. If there are places that look like a previous color is showing through, another coat is in order.
Tips & Tricks
Clean quickly
To use equipment again, make sure you clean brushes, rollers and other items right away. Many a good brush has been lost to dried, cracked paint in the bristles.
Don’t hurry to hang
Give the new paint a couple of days before you try to hang anything heavy on it. The paint will be dry, but still soft and can be damaged with a hefty painting hanging on it.
Clean after curing
It can take up to 30 days for your paint to completely cure. Don’t do any heavy scrubbing or rubbing on your newly painted walls for at least a month.
Humidity harrows
If you are painting in a humid room, like a bathroom or kitchen, take care in choosing paint. You’ll want to consider something with a satin sheen to stand up to the humidity that comes with those rooms. Preparing those rooms can be more time consuming as well as any grease must be removed before prep can begin.
Break for brushes
If you need to take an extended break but don’t want to fully clean your brushes, wrap them in plastic wrap or a bag and stick them in the fridge to preserve their use.
