
House Painting Secrets from Pro Painters
Posted on June 27, 2019


Do-it-yourselfers are very enthusiastic when it comes to home painting jobs. There is one thing the pros have that you don’t though – years of experience. So keep reading to gain some knowledge you can use on your next job.
Most of us are capable of painting a room to a decent look. A professional in the industry can do a great job. That’s partially because of on-the-job experience, but also techniques and tips they have gained from being in the field. We spoke with some professional painters to get the best tips they can offer to a novice painter.
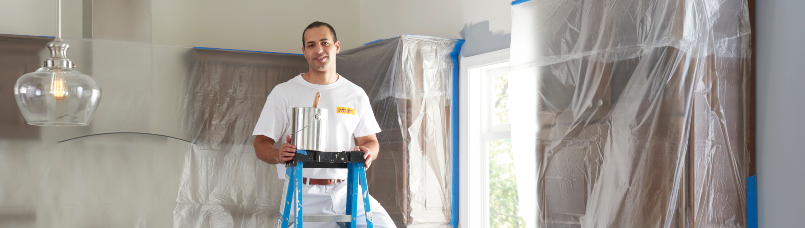
Clear the area
Beyond the stray paint drip, there is prep work that must take place in your room for a professional outcome. The steps include sanding and scraping which can make a big mess. To protect your furniture, and make it easier to complete the job, it’s best to completely remove it from the room. You’ll be able to sashay your way from wall to wall easier. If removal isn’t possible, at least pull everything to the center of the room and cover it with drop cloths. It won’t completely keep all of the dust out, but it’s a good start.
Do prep work
Most professional painters will tell you that your prep work should take longer than the painting job. To get the crisp look of a pro, you’ll need to repair all of the cracks, dents, and holes before you can move any further in the project. Use putty or light spackle for minor issues. If you have damage to wood, it’s best to use a wood filler since the spackle tends not to stick. Sand everything flat and follow it up with a coat of primer to ensure good paint adhesion.
Sanding
Sanding will feather out any chipped paint, and create a good tooth for the new paint to stick to. If you are working on glossy paint, try a sanding sponge instead of paper. It will mold better to the shape of the trim you’re working on. The goal is to make sure you have removed the prior gloss or finish to allow new paint to stick easily to the walls.
Sponge the walls
Our pros insist you cannot skip this step. Cleaning the walls is imperative to removing old dust and cobwebs. If they are left on the wall before painting, you will end up with them texturing your new paint, permanently. Use a bucket of TSP No-Rinse Substitute and use a rag or sponge to wipe down the walls. The goal is not to soak the wall, just to remove dust. You’ll be surprised by the grime that comes off the walls. It might not have been visible to the naked eye but your paintbrush would have found it for sure.
Caulk all cracks
Cracks can ruin a new paint job. Use a paintable acrylic latex caulk to fill any cracks, especially around the trim. This is a tip the painters insist gives you a professional, polished finish. Make sure the tip of the caulk is smaller than you think it should be. Too much will cause messes further down the road.
Use tape – maybe
Some pros swear by tape, some swear at it. Paint can be a huge help in creating a straight line in your paint. That comes with the caveat that it can make painters feel more confident. This leads to overloading the tape with paint and messes that follow. Many a do-it-yourselfer has been found yelling at the tape that peeled up the finish or allowed the paint to bleed through behind it. If you choose to go the tape route, it’s a good idea to paint with extra care against it. Don’t overload it with too much paint. Also, when applying it, use a putty knife to seal the paint against the edge. Plan to give it an exceedingly long dry time to avoid pulling the finish up. Some pros insist cutting along the edge of the tape with a knife will avoid this issue.
Picking paint
Every painter suggested using primer. It’s more than just another coat of paint to deal with. It’s the difference between I did it myself and wow this room looks great. The primer will make a solid, even base and seal out stains before you put your color on the walls. There are primers available for nearly any use and kind of paint. To choose the right one, talk to your local paint store when you get your color paint. They can help tell you what kind of primer is best for your job.
Go for gloss
Understanding the room you are painting will make the difference in what sheen you choose for your job. Flat paints are great for ceilings and rooms of little use. If you’re painting a messier room, like a kitchen or bath, it’s a good idea to use an eggshell or gloss finish. This will protect your paint and allow you to scrub the walls every so often.
Paint additives
Manufacturers make paints formulated to dry quickly. This can impede rolling or brushing it on if you are not quick like a pro. There are additives available for paints that slow dry time and make the paint easier to manipulate. It will give it a smoother roll or brush application and allow you more time before it gets too dry to work with.
Picking a roller
More than likely, you’ll be painting vast, flat spaces in your room. The ideal tool will be a roller. Keep in mind when shopping that the longer the nap of the roller the more paint it will hold, but it will also leave a texture behind. To get a good amount of paint without too much texture, our pros say a ½-inch lamb’s wool roller will be best for your job. Cheaper rollers can leave fibers behind, but if you wash the roller with dish soap before use, you should be ok.
Grab a bucket
Using a 5-gallon bucket with a roller grid is the tool of choice to hold your paint. It holds more than a pan will and is more stable (read: won’t move around) on the floor. Most likely your job will require more than one gallon of paint. There can be slight variations in the color mixes of each can, so mixing them together before starting will allow a single color to be painted.
Good brushes
Good brushes can make your paint look professional. Our experts say to pay attention to what the bristles are made of. For finer work, aim for nylon, but polyester is great for interior work. Go for tapered, stiff bristles. Use your judgment for the size of the brush for the job. If you are painting tight spaces, go smaller, if you’re needing to cover more ground along the trim, go bigger.
Close cutting
Cutting in on a wall, it’s important to load your brush and create a line close to the trim you’re working around. Spread excess paint out from the cut in a feathering. Rolling over the edge of this will make the lines virtually impossible to see after the paint dries.
Ceiling to floor
As you work through your project, start at the top and work your way down. If you are painting the ceiling or crown molding, begin there. Follow that with the walls, and finally the baseboards. Keep in mind you’ll need to allow dry time between each step to avoid smeary messes.
Check your work
Just like math class, you’ll want to check your work. While the walls are drying, check on any bumps, drips, or other imperfections. Sand them down and cover them in the next coat of paint. Use a bright light to check for areas that have not been fully covered. Make sure you do this before you pack up and begin putting the room back together. A missed spot will draw your eye in – mocking you.
Do windows first
Take on windows first thing in the morning when you’re clear and energized. Standard windows can take our pros up to an hour to paint. There are a lot of little corners and crevices to attend to, as well as intricate inside and outside work to be done. You will need to be early on in your day to make sure you hit them all.
Do doors
You can try to paint doors in place, but it has tripped up more than one homeowner painter. Our pros recommend removing the door and working flat on sawhorses. If that’s not possible, work on one side of the door, then the edges that close, finally the other side. You’ll need to let each area dry between projects, otherwise, you’ll paint-glue yourself in the room.
Skip daily cleaning
Your project may take longer than one day, if that is the case, our pros say to skip cleaning brushes and rollers at the end of the day. This is especially true if you are using latex paint. It dries more slowly in cold temperatures. Put your paint tools in plastic wrap or grocery bags and stick them in the refrigerator until morning. Allow them to come up to temperature before using them again.
Touch-ups
There will be touch-ups. Even our professional painters occasionally have to head out for a quick touch-up. Expect a touch-up or two will be necessary once the job is completed. It’s very difficult to manage to hit every angle of every corner in one swipe. Store extra paint that’s leftover for a few days and keep a small brush on hand.
We’re here to help if you need us. We offer a wide variety of interior and exterior painting services to assist you with any of your projects. Schedule a free estimate online today to get started!
